Photography Tips
by Michael Frye | Sep 4, 2012 | Composition, Photography Tips
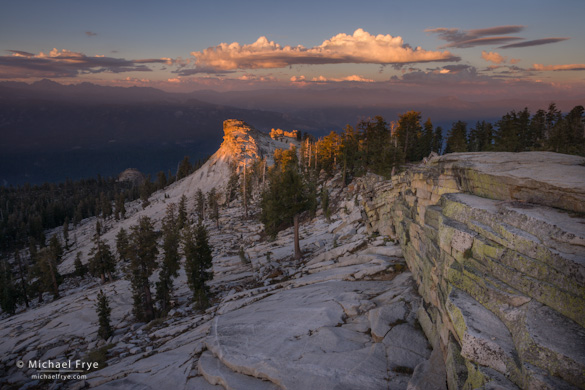
Last light on a granite thumb below Shuteye Peak
The Journey to Shuteye Peak
Last Thursday my wife Claudia and I—and our dog Rider—went to Shuteye Peak to photograph the moonrise. (Well Claudia and I went for the moonrise—Rider went to look for squirrels.)
Shuteye Peak is in the Sierra National Forest south of Yosemite, and from the fire lookout on top (8,351 feet) you can see a spectacular 360-degree view that includes the Clark Range, Mt. Lyell (both in Yosemite), Mount Ritter, the Minarets, Mammoth Mountain, Bear Creek Spire, the Kaiser Wilderness, and the deep gorge of the San Joaquin River 5000 feet below.
I had been to Shuteye Peak many years ago on a scouting trip. I didn’t take any photos, but remembered the amazing view and wanted to go back. Claudia and her friend Anne had tried hiking there last year, but hadn’t managed to navigate the maze of Forest Service roads approaching the mountain.
There’s a road to the summit of Shuteye Peak, and supposedly in the past you could drive a station wagon up it. Not any more. The road has deteriorated, to say the least, and now the last two-and-a-half miles from Little Shuteye Pass are a very difficult and rocky four-wheel-drive trail, suitable only for expert drivers in appropriate vehicles. We found the route to Little Shuteye Pass (even that road requires a high-clearance vehicle), but hiked that last stretch.
(more…)
by Michael Frye | Aug 29, 2012 | Composition, Photography Tips, Vision and Creativity
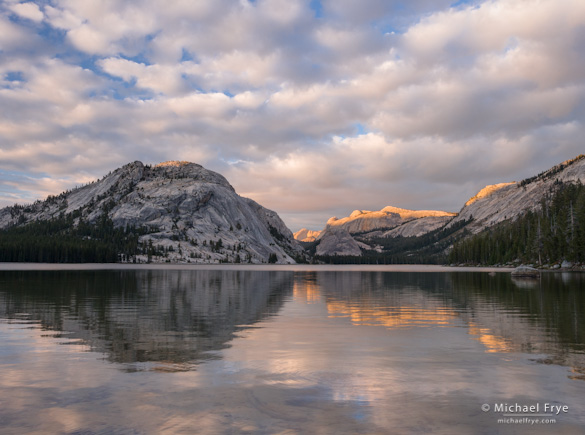
(A) Clouds and reflections, Tenaya Lake, Yosemite
At Tenaya Lake last week my workshop student and I watched and photographed a spectacular, constantly-changing cloud display for over two hours. I made many images, including the one at the top of this post (you can see two more here and here). With the lake in the foreground every composition included a prominent horizon line, so I was often thinking about where to place the horizon in the frame.
It’s not always an easy decision. If you’ve ever read any books on composition you probably learned about the rule of thirds. And when applied to horizons this means you should place the horizon a third of the way from the top or bottom of the photograph. And you probably also read that you should, at all costs, avoid putting the horizon in the center of the frame.
As many of you already know, I’m not a big fan of the rule of thirds. It’s too restrictive, too limiting when applied to the infinite number of possible subjects and situations a photographer can encounter. It’s useful sometimes, but shouldn’t be taken as dogma.
I think this applies to horizons as well. Sometimes putting the horizon a third of the way from the top or bottom works. Sometimes it’s better to ignore the rule and put the horizon right in the middle, or near the top or bottom of the frame.
(more…)
by Michael Frye | Mar 29, 2012 | Light and Weather, Photography Tips
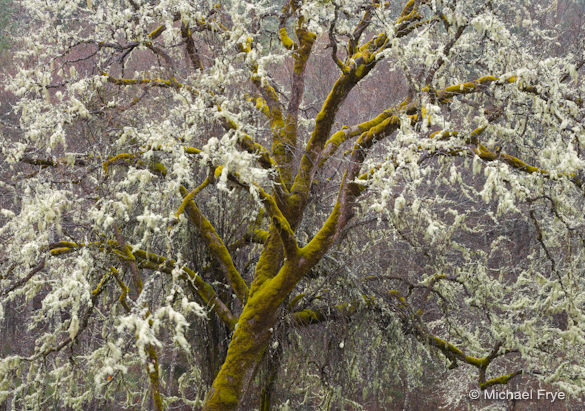
Mossy oak in the rain
Claudia and I are in Humboldt County this week visiting our son Kevin, who’s a junior at Humboldt State University. This is redwood country, along the far northern coast of California. It’s a temperate rain forest, and it sure seems like it this week. It’s been raining—a lot. Yesterday we had a break, and a mostly rain-free day, but another storm arrived today, and the area is expected to get six to ten inches of rain over the next two days.
Although we’re mainly here to visit our son, of course I hoped to do some photography in this beautiful area as well. The main challenge of photographing in the rain is keeping the camera dry. I’ve tried many different ways of doing this: umbrellas, towels, plastic bags, etc, but there’s no perfect solution. Various people make rain covers for cameras, which work pretty well, but only for telephoto lenses. In fact it’s a lot easier to photograph with long lenses in the rain, regardless of what kind of cover you put over the camera, because you can use a long lens hood to keep rain off the front glass. Hoods for wide-angle lenses have to be short, to avoid vignetting, which makes it difficult to keep water from splashing onto the front element. The best solution I’ve found for wide-angle lenses is to attach an umbrella to my tripod with a clamp. This works, but it’s awkward.
(more…)
by Michael Frye | Mar 9, 2012 | Photography Tips, Vision and Creativity
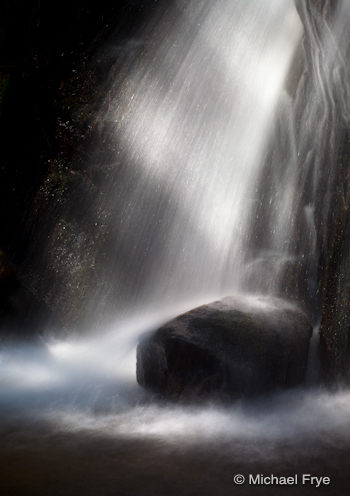
Small waterfall in Yosemite Valley, high noon
Everyone develops routines and habits: waking up at the same time every day, eating the same thing for breakfast, taking the same route to work… and on and on. Routines are beneficial in some ways—they help us avoid spending time and energy making small, unimportant decisions every day.
In photography, routines can help with the technical, left-brained stuff. Always putting lens caps in the same place in your camera bag, or the same pants pocket, can help save time and avoid frustration. Checking off a mental list before pressing the shutter can prevent mistakes. Did you adjust the polarizer? Focus? Set the right aperture? Shutter speed? Did you check the histogram? What’s your ISO?
But routines also dull the senses, and in photography that can be deadly. I’ve photographed this small waterfall in Yosemite many times, but always in the shade. Soft light works well for subjects like this—it makes it easy to use slow shutter speeds, and simplifies the lighting. So I’d never even considered visiting this spot when sunlight was hitting the water.
Last weekend I was shooting footage for some instructional videos in Yosemite Valley. I wanted to talk about using slow shutter speeds with moving water, but the crew only had one day in Yosemite, and the schedule only allowed us to visit this waterfall at noon. As we approached the fall I thought, hmm, this might work. Backlight filtering through the trees created some interesting patterns, and as the sun moved it started to highlight just the right spots. As I was demonstrating how different shutter speeds affected the appearance of the water, I was looking at the images on my viewfinder and thinking, “Wow, that looks pretty cool!”
(more…)
by Michael Frye | Feb 16, 2012 | Announcements, Photography Tips
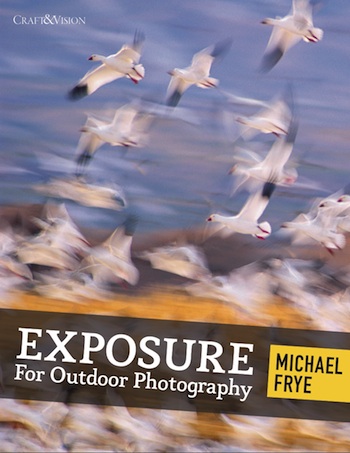
Exposure for Outdoor Photogoraphy
I’m pleased to announce the release of my second ebook: Exposure for Outdoor Photography.
In photography, creativity and technical skill are both essential. It’s great to have a wonderful eye and imagination, but no one will appreciate your genius if your images are washed out and blurry.
The most essential technical skill a photographer must master is exposure. On the surface, exposure seems easy. It’s simply a matter of making the image bright enough—not too dark, and not too light. But the endless variety of light makes exposure challenging. No two situations are the same, so there can be no exact formula for getting the right exposure. On the other hand, exposure doesn’t need to be overly complicated. The fundamental controls—shutter speed, aperture, ISO, light meters—are easy to understand.
Previously on this blog I’ve written about some of these fundamentals, like reading histograms and adjusting exposure. In this ebook I start with a more comprehensive discussion of these essentials, then go deeper by taking you through ten practical, real-life examples where I’ve used these basic principles to control the exposure, the sharpness, and the photograph’s message.
The examples go from easy to complex, and include using a histogram to find the right exposure, controlling depth of field, freezing and blurring motion, when to push the ISO, spot metering and the Zone System, and HDR and exposure blending. I also include several exercises to help improve your technique. It’s a concise, easy to understand, yet comprehensive course in mastering the most important skill in photography.
Like all Craft & Vision ebooks, Exposure for Outdoor Photography is normally only five dollars. But for the next four days you can get it for only four dollars. Just use the code EXPOSURE4 at checkout. Or use the code EXPOSURE20 to get 20 percent off if you buy five or more Craft & Vision ebooks—including my previous volume, Light & Land: Landscapes in the Digital Darkroom.
Exposure for Outdoor Photography is temporarily unavailable. Stay tuned for updates on a revised version.
—Michael Frye
Related Posts: Light & Land eBook Available Today!; Digital Photography Basics: Reading Histograms; Digital Photography Basics: Adjusting Exposure
Michael Frye is a professional photographer specializing in landscapes and nature. He is the author and photographer of The Photographer’s Guide to Yosemite, Yosemite Meditations, and Digital Landscape Photography: In the Footsteps of Ansel Adams and the Great Masters, plus the eBook Light & Land: Landscapes in the Digital Darkroom. He has written numerous magazine articles on the art and technique of photography, and his images have been published in over thirty countries around the world. Michael has lived either in or near Yosemite National Park since 1983, currently residing just outside the park in Mariposa, California.
by Michael Frye | Jan 12, 2012 | Photography Tips, Yosemite Photo Conditions
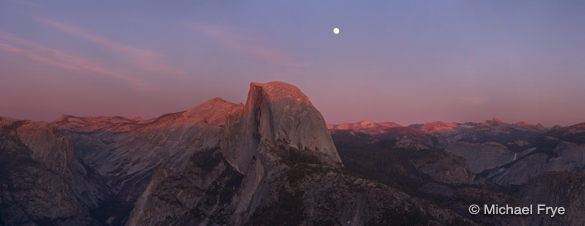
Moonrise from Glacier Point Saturday evening
In my post last Thursday I mentioned that there might be a good opportunity to photograph the moonrise from Glacier Point on Saturday evening. So Claudia and I went to Glacier Point that night, where we met lots of photographers. It was nice to see familiar faces, and meet some online acquaintances in person. Thanks to all of you who came up to me and said hello!
Of course in between socializing we all photographed the moon rising behind Half Dome. My favorite image from this evening is the panorama above (stitched together from five separate frames). If you were there, I’d love to see the images you made, so please post a link in the comments. And if you photographed the moon somewhere else, I’d like to see those images too!
(more…)


