Landscapes in Lightroom: The Essential Step-by-Step Guide
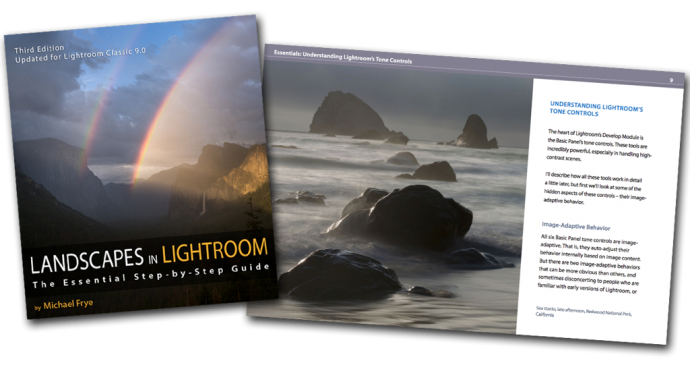
Landscapes in Lightroom: The Essential Step-by-Step Guide
PDF ebook plus video tutorials
116 double-page spreads
17 video tutorials with a total runtime of 3 hours and 45 minutes
DNG sample files available for download
FAQ
$47
Here it is! The third edition of my course Landscapes in Lightroom: The Essential Step-by-Step Guide is now available. This new edition is revised and updated for Lightroom Classic CC, and includes a brand new example where I take you step-by-step through processing a Milky Way photograph, plus six new videos about the Range Mask, the Profile Browser, fixing coma, removing color fringing around stars, and more.
Of course this new version still has all the features that made the first two editions so popular. First, you can download the original Raw files used as examples in the ebook, and then follow along with each step yourself – just as if you were attending one of my workshops.
Second, when you purchase the ebook you get exclusive access to 17 videos demonstrating different aspects of Lightroom’s Develop Module, like the Adjustment Brush, Spot Removal Tool, Point Curve, HDR Merge, Panorama Merge, performing advanced retouching, and much more. It’s great to read about a tool or technique; it’s even better to watch a demonstration, and then try it yourself on the same image.
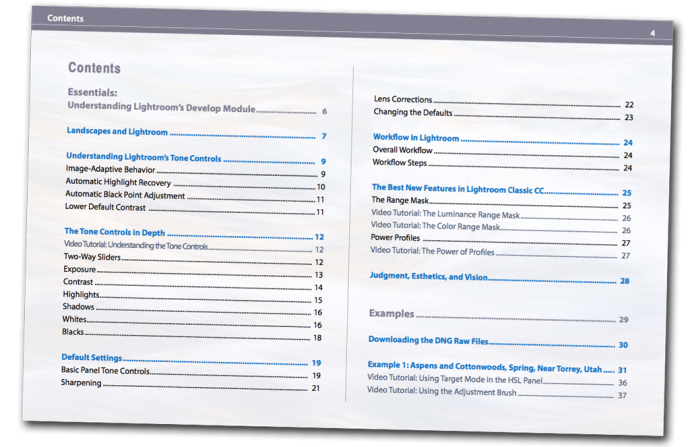
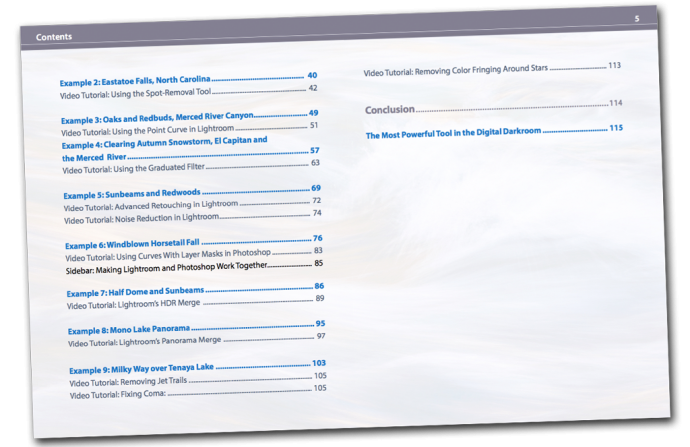
And third, there's the PDF ebook itself. This includes nine examples, where I take you step-by-step through processing each image in Lightroom. You’ll get to see my workflow in action, with a variety of images – high contrast, low contrast, color, black and white, HDR merge, panorama, and even a Milky Way photograph. You’ll learn many specific techniques and tips, but perhaps more importantly, you’ll gain insight into the decision-making process that so many photographers struggle with. How much contrast is enough? How far can you push the saturation without making the image look garish or fake? What’s the right white balance?
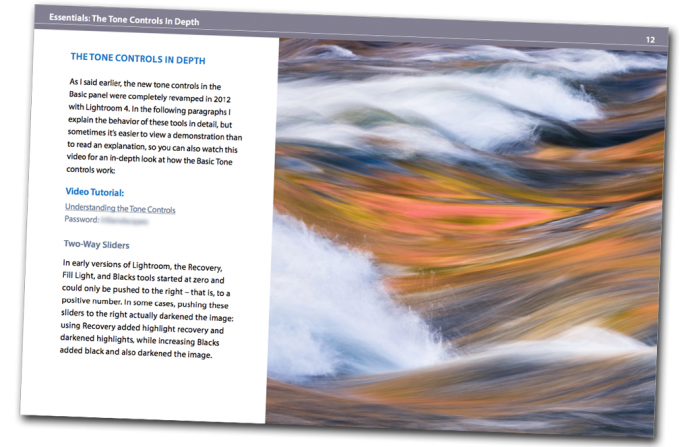
And there’s much more. The first section of the ebook is devoted to understanding the Develop Module, and especially the powerful Basic Panel Tone Controls. There are many things going on under the hood that haven’t been talked about much (not even by Adobe, for some reason) like the automatic highlight recovery, and how all the Basic Panel Tone Controls are image-adaptive – that is, they auto-adjust their behavior based on image content. To help you understand how all this works you'll find a completely revamped video on the tone controls that covers that image-adaptive behavior, how each tool works, why you might consider changing your default settings, and how to approach processing both high-contrast and low-contrast images.
Here’s just a partial list of things you’ll find in the ebook:
- An in-depth look at the Basic Panel Tone Controls
- Image-adaptive behavior: how Lightroom’s tone controls auto-adjust their behavior internally based on image content.
- The best recent features in Lightroom Classic, including the Range Mask and Profile Browser.
- Default settings: where should you start?
- Establishing a workflow
- Adjusting white balance
- Using the Adjustment Brush and Graduated Filter
- Using the Target Mode in the HSL Panel
- Straightening leaning trees
- Handling high-contrast scenes
- Converting images to black and white
- Using curves
- Using the spot removal tool
- Advanced retouching in Lightroom
- Integrating Lightroom with Photoshop
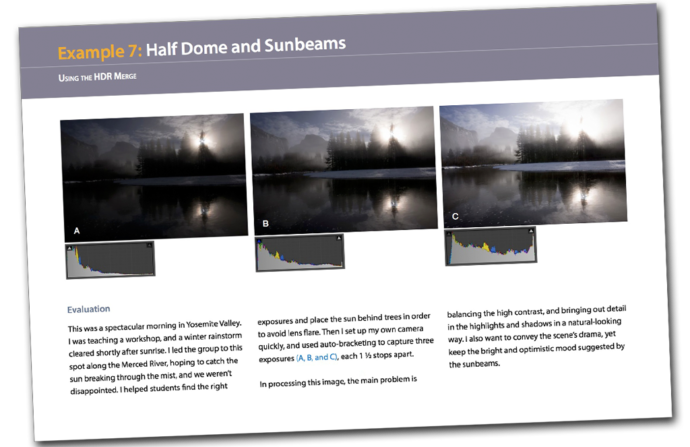
- Using the HDR Merge
- The Panorama Merge
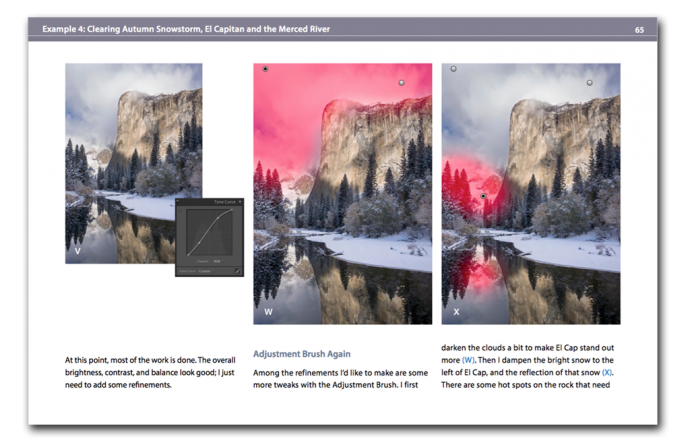
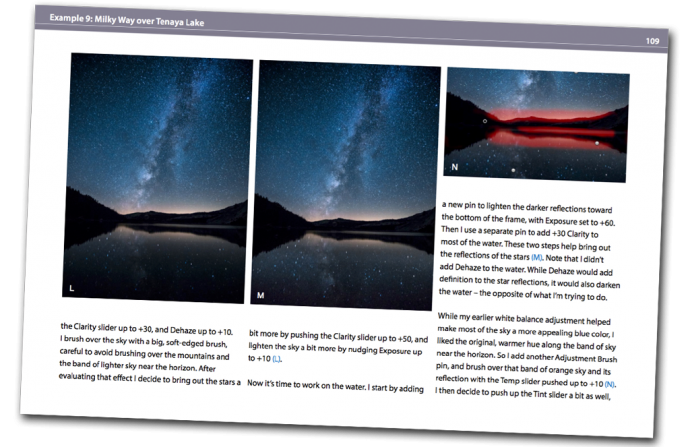
- Processing a Milky Way photograph
And if you’re still using a standalone version of Lightroom, almost everything in this ebook still applies. And that goes for ACR too! All the tools in Adobe Camera Raw are essentially identical to Lightroom's Develop Module – they're just laid out differently, and sometimes work slightly differently. But everything I talk about in this book can be done in Adobe Camera Raw 10.0 or later, and most things with ACR 6.0 and up.
Questions? Read the FAQ
Free Video
To give you a taste of what the video tutorials are like, here's a seven-minute video that explains how the automatic highlight recovery and automatic black point adjustment work (some of that image-adaptive behavior I mentioned above). The full 44-minute video about the Basic Panel Tone Controls is included with the ebook and video package, and has much more, including an in-depth look at all the Tone sliders, an explanation of why Adobe's default settings might not be the best starting place for many images, and demonstrations of how I approach processing both high-contrast and low-contrast images in Lightroom. Here's the short version:
Sample Pages
This should be required reading for all Lightroom users, and I am certainly recommending it to my friends. It is light years ahead of anything else I am familiar with. Thanks for writing it…you have changed the way I process!