In the Moment:
Michael Frye's Landscape Photography Blog
by Michael Frye | Oct 11, 2012 | Yosemite Photo Conditions
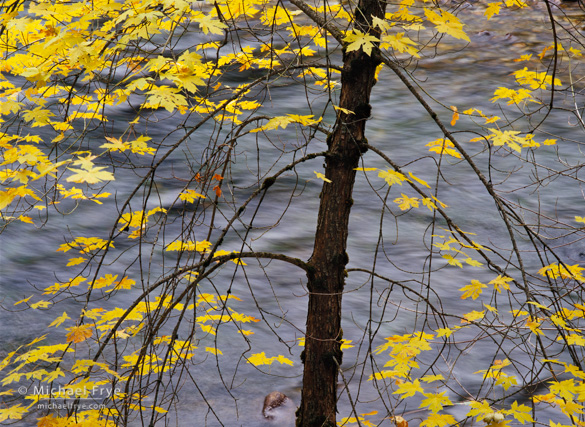
Big-leaf maple along the Merced River in Yosemite Valley (from late October a few years ago)
We had a great weekend with Sierra Art Trails. Sales were good, but it was especially nice to meet many online friends in person, and to renew old acquaintances. Thanks to all of you who stopped by!
I had a chance to check out the fall color in Yosemite Valley yesterday afternoon. Some of the maples and dogwoods are starting to turn, but I didn’t see a single tree that had fully changed. All the maples and dogwoods had at least some green leaves, and most were entirely green. At this point it looks like the autumn color in the Valley will peak near the end of October or beginning of November—the normal time.
Over on the eastern side of the Sierra the higher-elevation aspens started turning early this year, and are now mostly past peak. But recent reports I’ve heard indicate that the mid- to lower-elevation aspens are changing more slowly. They seem to be on a typical schedule, which means there should still be good color over on the eastside for another couple of weeks.
There’s a chance of rain and higher-elevation snow in the forecast for the next two days. The predictions don’t call for high winds, which is good news—strong winds could strip some of the yellow leaves off the trees. If Tioga Pass stays open I’m planning to head over to the eastern Sierra on Friday, so I can give you a first-hand report on the eastside color, and the effect of this weather system—if any.
—Michael Frye
Michael Frye is a professional photographer specializing in landscapes and nature. He is the author and photographer of The Photographer’s Guide to Yosemite, Yosemite Meditations, and Digital Landscape Photography: In the Footsteps of Ansel Adams and the Great Masters, plus the eBooks Light & Land: Landscapes in the Digital Darkroom, and Exposure for Outdoor Photography. He has written numerous magazine articles on the art and technique of photography, and his images have been published in over thirty countries around the world. Michael has lived either in or near Yosemite National Park since 1983, currently residing just outside the park in Mariposa, California.
by Michael Frye | Oct 2, 2012 | Announcements
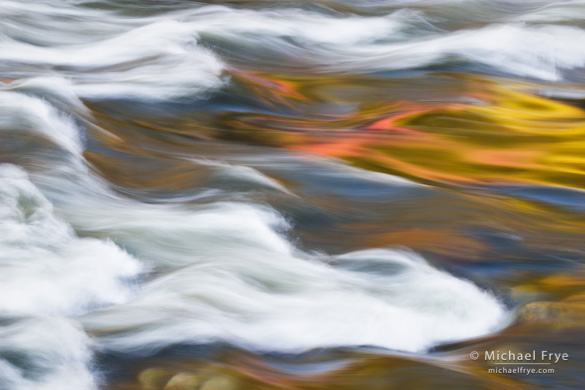
Redbud reflection in the Merced River
This is just a quick reminder that I’ll be participating in the Sierra Art Trails open studios event this weekend. I’ll be at Casto Oaks Fine Wine and Art in downtown Mariposa Friday through Sunday, so if you’re headed to Yosemite or over to the eastern Sierra I hope you’ll stop by and say hello!
I’ll be showing a wide variety of work, including classic daytime landscapes, nighttime photographs, and high-key images. This is my first time doing an open-studio event like this, and during this weekend only I’ll have special pricing on prints that have been returned recently from galleries and museums, so this is a chance to get one of my limited-edition fine prints at a discount. I’ll also have my small matted prints available, plus signed books and posters.
And if that’s not incentive enough, Casto Oaks will be offering free wine tasting, and 10% off all of their wines during Sierra Art Trails, including their 2009 Cabernet Sauvignon, a 2012 San Francisco Chronicle Gold Medal winner.
The $18 Sierra Art Trails catalog is your admission ticket for the weekend, and includes information about all 108 artists and maps to the studios. You can purchase a catalog at Casto Oaks, or at one of the other locations listed here.
Hope to see you this weekend!
—Michael Frye
Related Posts: Art and Wine in the Sierra Foothills, October 5-7
(more…)
by Michael Frye | Oct 1, 2012 | Yosemite Photo Conditions
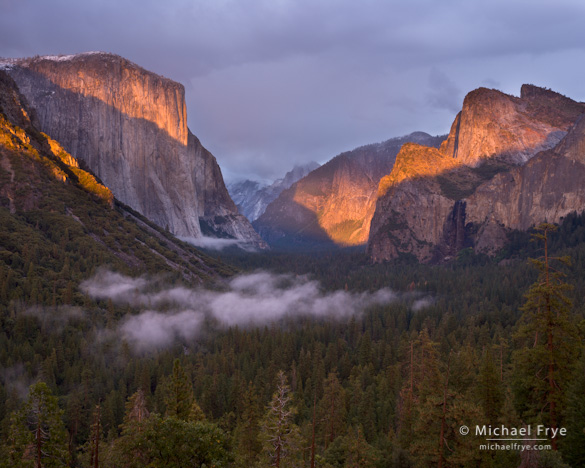
Autumn sunset from Tunnel View, October 4th, 2009
October is such a great month for photography in the Sierra Nevada. The leaves are changing color, and the light is changing too as the sun shifts from it’s high summer position to the lower, more interesting angles of winter.
Early October is a perfect time to photograph two of Yosemite’s classic views—Tunnel View and Gates of the Valley. In summer, from either of these spots, the late-day sun illuminates Cathedral Rocks on the right, but not El Capitan on the left. In winter it’s the opposite—sunset light strikes El Capitan, but not Cathedral Rocks. But for about two weeks in early October and early March both these rock formations get hit by the late-afternoon sun, so the light is evenly balanced. This image from Tunnel View, made on October 4th, 2009, shows that balanced illumination.
Of course the biggest show of the month is put on by all those colorful autumn leaves. The aspens have already started turning on the east side of the mountains, and by the end of October the dogwoods, maples, cottonwoods, and oaks will be changing in Yosemite Valley. Last week I linked to an article that describes the typical progression of fall color in and around Yosemite, but here’s another link in case you missed it.
Happy October! I hope you all have a wonderful month.
—Michael Frye
Related Posts: Autumn Begins!; Autumn in Yosemite
by Michael Frye | Sep 27, 2012 | Advanced Techniques, Night Photography, Photography Tips
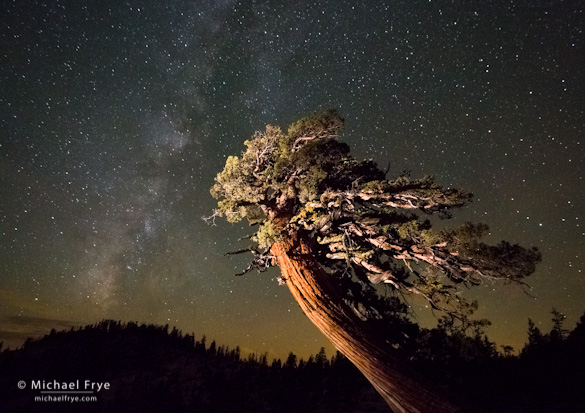
Sierra juniper and the Milky Way, Olmsted Point, Yosemite
Gear Doesn’t Matter—Except When it Does
Regular readers know that I’m not much of an equipment geek. It’s not that I don’t think equipment is important—a photographer needs good tools. It’s just that I think light, composition, technique, vision, and imagination are more important. In other words, how you use the tools is more important than what tools you use.
But sometimes the right gear can make a difference. Two weeks ago I was recording video segments for some online courses I’m working on (more about that later!), and needed a digital SLR that could record video—something my trusty old Canon 1Ds Mark II can’t do—for some “through-the-lens” views. So I called up my friend Jim Goldstein. Many of you know Jim through his popular blog and social media streams. Jim also works for Borrowlenses.com, and he set me up with a Canon 5D Mark III for my video shoot, and then asked, “Is there anything else you need?” Hmm… well I’ve been wanting to test the Canon 24mm f/1.4L lens for night photos, so yes, there was something else!
(more…)
by Michael Frye | Sep 25, 2012 | Yosemite Photo Conditions
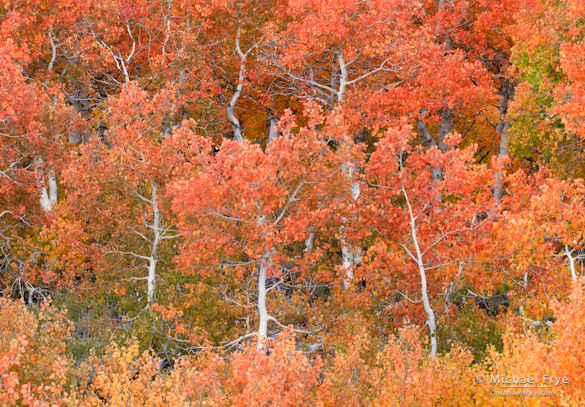
Early-season aspens above Conway Summit (October 4, 2004)
If you’ve been reading this blog for awhile you probably know that Claudia and I go to the Millpond Music Festival in Bishop every September. We just got back from this year’s event, and I can report that we had a wonderful, fantastic, amazing time. This is either the 13th or 14th consecutive year we’ve attended this festival, so we obviously love it.
This festival always takes place around the third week of September, so our trip gives us a chance to check out the early fall color on the eastern side of the Sierra. I’ve been hearing reports that the aspen leaves are turning early this year on the east side (and in Colorado too according to Jennifer Yu). On our way home yesterday we took a quick drive up Rock Creek Canyon. I didn’t take any photos, but I can confirm that the colors are indeed changing quickly. Rock Creek isn’t at peak yet, but it won’t take long, and by this coming weekend the upper reaches should be at or near peak.
(more…)
by Michael Frye | Sep 13, 2012 | Announcements
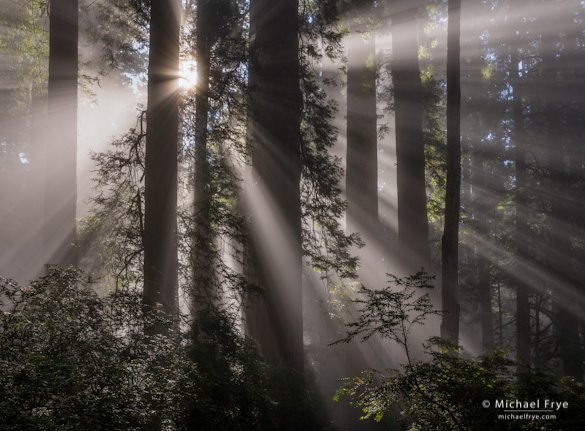
Next week I’ll be announcing two new workshops for 2013. I’m very excited about these courses because they’ll offer great learning experiences in amazing places. I can’t wait to tell you about them, but because these workshops often fill quickly I want to give my most dedicated, loyal supporters the first chance to sign up. So the initial notice about these workshops will only go to people who are subscribed to my blog and email list, not to the public.
(more…)
by Michael Frye | Sep 10, 2012 | Announcements
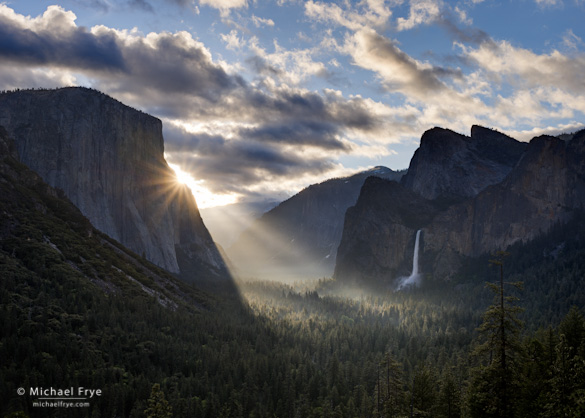
Sunbeams from Tunnel View, spring, Yosemite National Park
For the first time ever I’ll be participating in Sierra Art Trails, this October 5th through 7th. Sierra Art Trails is an annual event in the Sierra foothills near Yosemite featuring wonderful local artists, including many who are nationally and internationally known. The open studios give visitors a chance to meet the artists and sometimes see demonstrations of how they produce their work.
I’ll be showing my work at Casto Oaks Fine Wine and Art in downtown Mariposa. My display will include a wide variety of images, old and new, including classic daytime landscapes, nighttime photographs, and high-key images. I’ll also have my small matted prints available, plus signed books and posters—and special prices on many items. I always enjoy meeting online friends in person, so please stop by and say hello if you’re in the area.
(more…)
by Michael Frye | Sep 4, 2012 | Composition, Photography Tips
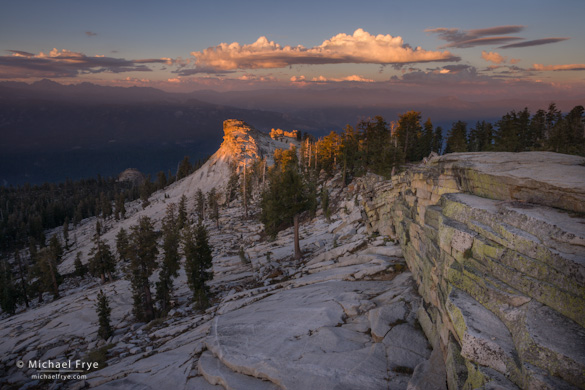
Last light on a granite thumb below Shuteye Peak
The Journey to Shuteye Peak
Last Thursday my wife Claudia and I—and our dog Rider—went to Shuteye Peak to photograph the moonrise. (Well Claudia and I went for the moonrise—Rider went to look for squirrels.)
Shuteye Peak is in the Sierra National Forest south of Yosemite, and from the fire lookout on top (8,351 feet) you can see a spectacular 360-degree view that includes the Clark Range, Mt. Lyell (both in Yosemite), Mount Ritter, the Minarets, Mammoth Mountain, Bear Creek Spire, the Kaiser Wilderness, and the deep gorge of the San Joaquin River 5000 feet below.
I had been to Shuteye Peak many years ago on a scouting trip. I didn’t take any photos, but remembered the amazing view and wanted to go back. Claudia and her friend Anne had tried hiking there last year, but hadn’t managed to navigate the maze of Forest Service roads approaching the mountain.
There’s a road to the summit of Shuteye Peak, and supposedly in the past you could drive a station wagon up it. Not any more. The road has deteriorated, to say the least, and now the last two-and-a-half miles from Little Shuteye Pass are a very difficult and rocky four-wheel-drive trail, suitable only for expert drivers in appropriate vehicles. We found the route to Little Shuteye Pass (even that road requires a high-clearance vehicle), but hiked that last stretch.
(more…)
by Michael Frye | Aug 29, 2012 | Composition, Photography Tips, Vision and Creativity
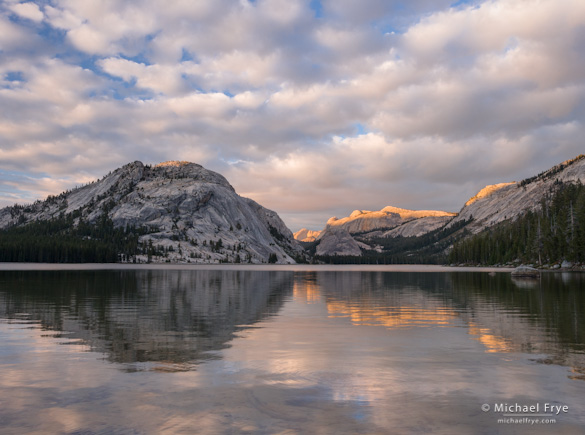
(A) Clouds and reflections, Tenaya Lake, Yosemite
At Tenaya Lake last week my workshop student and I watched and photographed a spectacular, constantly-changing cloud display for over two hours. I made many images, including the one at the top of this post (you can see two more here and here). With the lake in the foreground every composition included a prominent horizon line, so I was often thinking about where to place the horizon in the frame.
It’s not always an easy decision. If you’ve ever read any books on composition you probably learned about the rule of thirds. And when applied to horizons this means you should place the horizon a third of the way from the top or bottom of the photograph. And you probably also read that you should, at all costs, avoid putting the horizon in the center of the frame.
As many of you already know, I’m not a big fan of the rule of thirds. It’s too restrictive, too limiting when applied to the infinite number of possible subjects and situations a photographer can encounter. It’s useful sometimes, but shouldn’t be taken as dogma.
I think this applies to horizons as well. Sometimes putting the horizon a third of the way from the top or bottom works. Sometimes it’s better to ignore the rule and put the horizon right in the middle, or near the top or bottom of the frame.
(more…)
by Michael Frye | Aug 16, 2012 | Vision and Creativity

Reeds and Cloud Reflections no. 1
Planning
The future is uncertain, so we try to control it by planning. We think that if we do A and B the result will be C. But sometimes there are too many variables that we can’t account for, so the result might not be C—it could be D, or E, or even Z.
Photographers often try to plan. We imagine that if we go to a certain location at a certain time we’ll capture a certain photograph. Sometimes this works, but frequently the weather doesn’t cooperate or conditions aren’t right.
(more…)


