Digital Darkroom
by Michael Frye | Nov 21, 2013 | Digital Darkroom
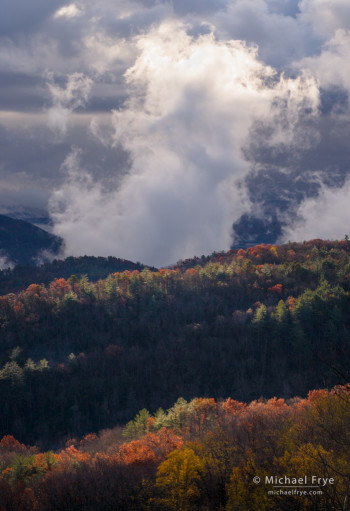
A creative cloud over the North Carolina/South Carolina border
Adobe is now offering its Photoshop Photography Program to everyone, not just those who own a license to a previous version of Photoshop. This program includes Lightroom 5 and Photoshop CC for $9.99 per month. This new offer is only available until December 2nd. (If you own a license to Photoshop CS3 or later you still have until December 31st.)
For people who would like to try Photoshop, but don’t own a previous Photoshop license, this seems like a good deal. In the past you would have paid nearly $700 to buy a full version of Photoshop for the first time. Now you can get Photoshop, plus Lightroom, for $120 per year.
For those who already own a license to Photoshop CS5 or CS6 things are less clear cut. The pricing for this Lightroom-and-Photoshop package is attractive, but you’re still renting rather than owning, and if you stop your subscription you lose access to the software. Many people are choosing to stick with their older versions of Photoshop, since they own a perpetual license and will never lose access to it. I discussed some of the pros and cons of this deal in a previous post. (Be sure to read the comments, as there are lots of interesting thoughts there.)
(more…)
by Michael Frye | Oct 2, 2013 | Digital Darkroom
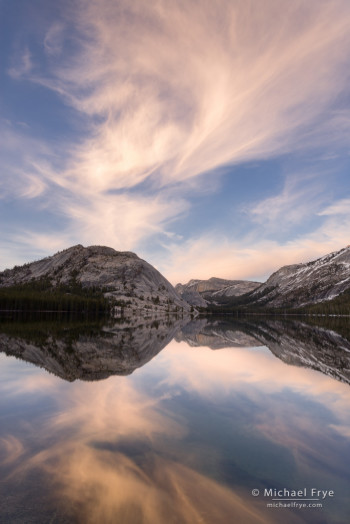
Sunset clouds, Tenaya Lake, Yosemite NP, CA, USA
Back in June I wrote about Adobe’s new subscription-only model for licensing Photoshop, called the Creative Cloud. Let’s just say that I wasn’t happy about it. But recently, as I’m sure many of you know, Adobe announced a new Photoshop Photography Program. For $9.99 per month you can get both Photoshop CC (Creative Cloud) and Lightroom, and it’s not an introductory price that will go up after a year. That doesn’t mean that it will never go up, but Adobe says that they don’t have any plans to increase the price at this time. (The offer is only available to people who currently own Photoshop CS3 or later, and it expires on December 31st.)
I have to say that this is a more attractive offer. $9.99 per month comes out to less than I’ve been paying for upgrades to both Lightroom and Photoshop. Of course I already own a license to Lightroom 5, so in the short term I’d really be paying just for Photoshop CC. But at least the price wouldn’t automatically go up after a year, and when Lightroom 6 comes out I’d get it for no extra charge.
Unfortunately this program won’t help you if you don’t already own Photoshop CS3 or later. It’s possible that Adobe might offer a version of this package (probably a more expensive version), to people who don’t already own Photoshop, but there’s no word of that yet. You can still buy Photoshop CS6 from places like Amazon and B&H, and that would then qualify you to get this Photoshop/Lightroom bundle, but that’s an expensive way to go, since CS6 is going for more than $600.
(more…)
by Michael Frye | Sep 30, 2013 | Digital Darkroom
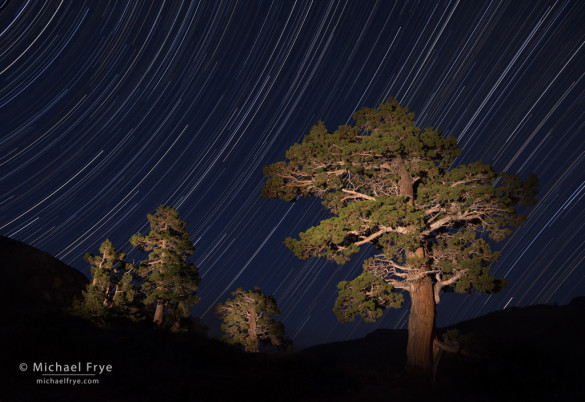
Star Trails and junipers east of Sonora Pass. Lightroom’s retouching tools keep getting more sophisticated; Lightroom 5’s Advanced Healing Brush was very helpful in removing jet trails from this image.
Adobe just released Lightroom 5.2, with a small but significant new feature: the ability to add feathering to the Spot Removal Tool’s brush. This adds further sophistication to Lightroom’s retouching abilities, continuing the theme introduced by the “Advanced Healing Brush” in Lightroom 5.0.
You usually want fairly hard-edged brushes with retouching tools, otherwise you’ll get unwanted blurring along the borders of your retouching areas. But small amounts of feathering can help make transitions smoother and the retouching less obvious. Try setting the Feathering in the Spot Removal Tool to 40 as a starting point, then modify it if necessary. And in keeping with Lightroom’s complete flexibility, you can adjust the feathering after the fact: you can place a spot or add a brush stroke, then adjust the feathering of that area to see the effect of different feathering amounts.
As I said, this is a small improvement, but a helpful one, and something worth paying attention to if you’re a Lightroom user. Naturally 5.2 is a free upgrade if you own Lightroom 5.
And while we’re on the subject, I’ve found the Advanced Healing Brush to be extremely helpful. This is a new capability added to the Spot Removal Tool in Lightroom 5.0, allowing you to brush over an area you want to retouch instead of using a series of discrete spots. It’s made my retouching in Lightroom more efficient, and allowed me to use Photoshop less and stay in Lightroom more. I’m curious about whether others have also found this new feature helpful—let me know how you like it.
— Michael Frye
(more…)
by Michael Frye | Jul 31, 2013 | Announcements, Digital Darkroom

Landscapes in Lightroom 5: The Essential Step-by-Step Guide
PDF ebook with video tutorials
87 double-page spreads
14.95


Special introductory offer: for a limited time get 20% off by using the code LR520 at checkout. Offer expires at midnight Pacific time on August 4th.
Here it is! My latest ebook, Landscapes in Lightroom 5: The Essential Step-by-Step Guide, is now available.
I’m really excited about this new ebook, because I’ve been able to incorporate features that make this more of a hands-on learning experience. First, you can download the original Raw files used as examples in the ebook, and then follow along with each step yourself – just as if you were attending one of my workshops.
Second, when you purchase the ebook you get exclusive access to eight videos demonstrating different aspects of Lightroom’s Develop Module, like using the Adjustment Brush, Spot Removal Tool, and Point Curve, advanced retouching in Lightroom, and much more. It’s great to read about a tool or technique; it’s even better to watch a demonstration, and then try it yourself on the same image.
(more…)
by Michael Frye | Jun 13, 2013 | Digital Darkroom
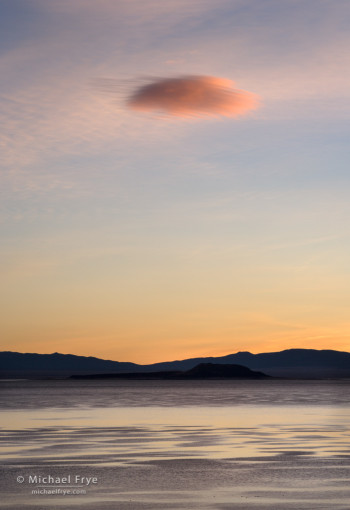
Lone cloud at sunrise, Mono Lake, CA, USA
There’s been a lot of internet discussion lately about the new Adobe Creative Cloud. If you haven’t heard about this, Adobe decided that it will offer its Creative Suite applications only by subscription. You can get the whole suite (including Photoshop, InDesign, Illustrator, Dreamweaver, etc.) for $50 a month, or an individual application for $20 a month. They’re offering first-year discounts for people who own a license to any CS3 or later application.
On the positive side, subscribers will get regular updates to the software when new features are ready, rather than having to wait for a new version to come out. On the other hand, $20 per month for an application represents a substantial price increase. The last Photoshop upgrade was $199. Since the original Photoshop CS came out in 2003, Adobe has upgraded Photoshop, on average, every 20.6 months. If that pace of innovation continued, a $199 upgrade price would average out to around $10 per month – or half as much as they’re asking for a Creative Cloud subscription to a single application.
I might be able to live with the price, but here’s the worst part: if you stop your subscription at any time, you can’t use the software anymore.
(more…)
by Michael Frye | Jun 12, 2013 | Digital Darkroom
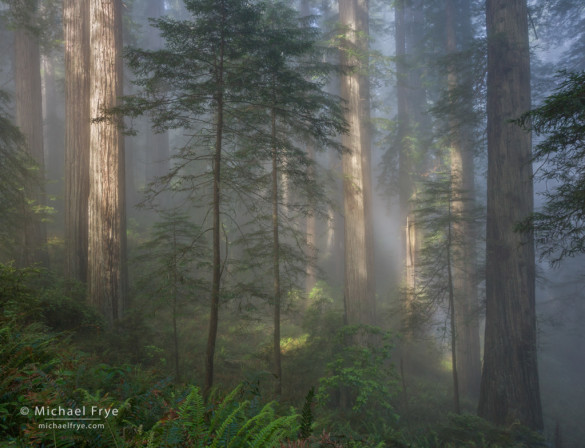
Sun breaking through fog in a redwood forest
We had a wonderful time up in redwood country. It’s such a beautiful area, and we had great conditions – plus two really nice groups of people, and the relaxing ambience of the Requa Inn to come home to after a long day of photography. It was a memorable and enjoyable two weeks.
I’ll post more images from the area soon, but I’ll start with this one showing sun breaking through the fog in a redwood forest. It can be difficult to work with this kind of splotchy light, but I loved the mood of this scene, and luckily the sun hit just the right spots, creating a nicely-balanced pattern of light and dark.
(more…)


