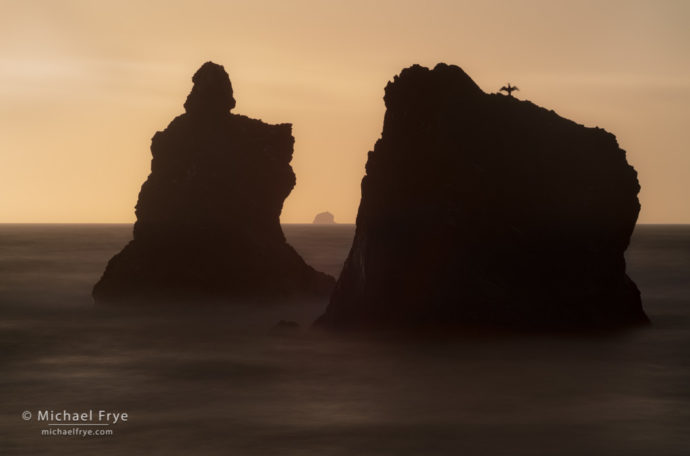
Sea stacks and cormorant, Redwood NP, CA, USA
Separating visual elements is a concern in any composition, but seems to be particularly vital when photographing the ocean and forest scenes along the northern California coast. Both sea stacks and redwood trunks need to be well-spaced, balanced, and stand out clearly.
Separation and spacing between objects has little to do with lens choice and framing; it’s all about where you stand. A small move to the left or right (and sometimes forward or back) can make a big difference in how different elements relate to one another within a photograph. I’ve written about this before (twice, actually), but this is an important part of composition, one that’s worth delving into in more depth, and some situations I encountered during our time in the redwood country provide particularly good illustrations of these concepts.
In the next photograph, for example, the middle rock is almost perfectly centered between the outer two rocks. A step to the left or right would have wrecked this balance, narrowing the spacing on one side while increasing the distance between rocks on the other side. There was basically one place to stand:
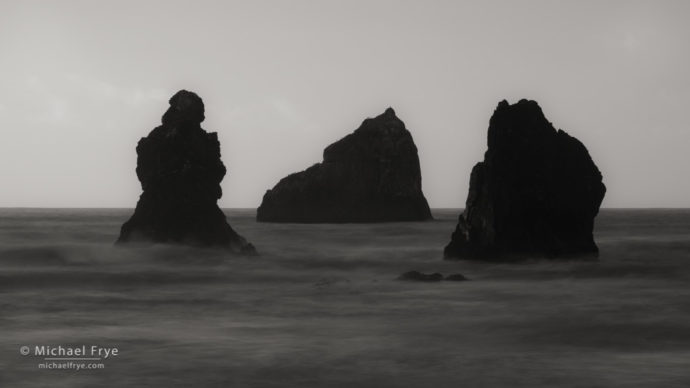
Sea stacks, Redwood NP, CA, USA
After making this photograph I moved further right. A small move, as you might imagine, wouldn’t work, as the central rock would then get pushed behind the right-hand rock, and the two shapes would merge into one big blob. So I had to walk far enough to make the more-distant rock (the middle one in the last photo) “move” visually to the right of the other two rocks, like this:
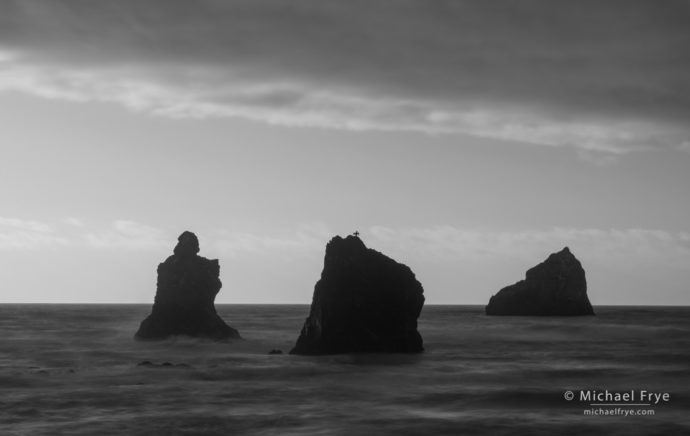
Sea stacks, clouds, and cormorant, Redwood NP, CA, USA
Again, I tried to create good balance and spacing between the three rocks. I don’t like the arrangement of shapes here quite as much as in the previous image, but it works, and the cormorant on the middle rock adds a nice touch.
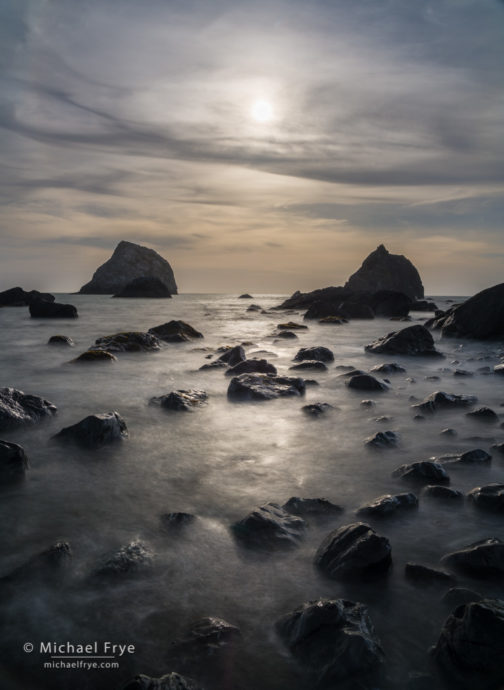
So what would happen if I kept moving further to the right? The two near rocks (the left-hand rocks in the last photo) would get closer together, and eventually merge visually, while the gap between the middle rock and right-hand rock would increase. That balance wouldn’t work unless you went far enough to the right to get that right-hand, distant rock out of the frame altogether, and concentrate on the other two rocks – as in the photograph at the top of this post. In that top image there’s actually a small merger at the bottom of the two large rocks, which would usually be a problem. But it turned out that there was another rock to think about, a much more distant one, and I had to fit that distant rock squarely between the other two.
Another option would have been moving a little to the left to hide that distant rock behind the left-hand rock, and gain more separation between the two large, foreground shapes. But I thought that distant rock added interest, and I didn’t mind the slight merger. In fact the merger created a nice negative-space V-shape between the two rocks. (If you click on that top image to view it larger you might be able to see a small bump on top of that distant rock – an old lighthouse.) Visual mergers usually look awkward and sloppy, like you weren’t paying attention. In this case I think it’s pretty obvious that the camera position was deliberately chosen to frame the distant rock between the foreground rocks, and the shape created by the negative space happened to work.
Once you have a good arrangement of the forms and shapes in front of you, it’s often possible to vary your focal length and framing to accommodate different lighting conditions, without moving the camera position. When some low clouds started to partially hide the sun I zoomed out to include the sun, clouds, and reflections on the water:
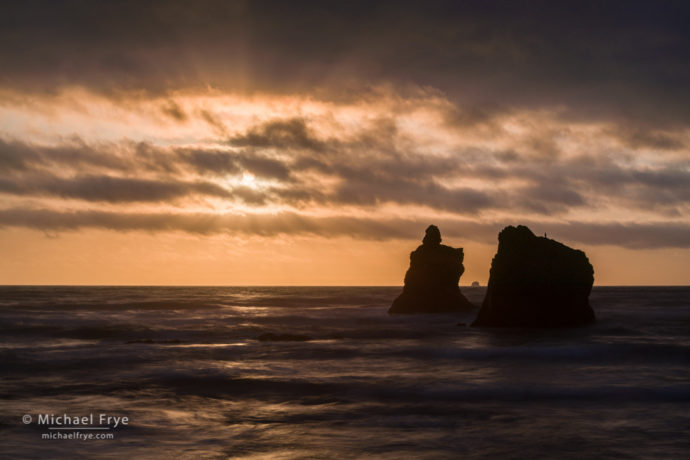
Sea stacks at sunset, Redwood NP, CA, USA
It’s rare to find sea stacks that are as cleanly separated as the ones in the previous examples. Usually you’re dealing with a jumble of rocks, like this:
Late-afternoon sunlight over the Pacific Ocean, Redwood NP, CA, USA
In these situations, try to find a camera position with as much separation, spacing, and balance as you can. It’s often impossible to avoid chopping at least one rock in half along the edge of the frame, but that’s okay as long as cut-in-half rocks on one side of the image are balanced by cut-in-half rocks on the other.
That’s what I tried to do in this last photograph; there are half-in-the-frame rocks on both the left and right sides, which roughly balance each other. There’s also a fairly even pattern of rocks in the foreground. The two large, pointed, distant sea stacks echo each other and are evenly balanced on each side of center, creating a certain left-right symmetry and balance, and that balance is also aided by the centered sun and its reflection.
The next image features more jumbles, but there’s at least a little separation between some of the more prominent foreground rocks. The large sea stack topped by trees stands out clearly, although it merges with some other rocks in its lower-left corner. It’s rare to find a perfect composition, so you have to do the best you can, and hope that the photograph’s content makes up for any compositional flaws:

Late-afternoon sunlight on rocks and sea stacks along the Pacific coast, Redwood NP, CA, USA
A bigger issue with this image is balance. Virtually all of the rocks are on the left side of the frame, which gives that half of the photograph a lot of visual weight. All that stuff on the left is balanced, at least somewhat, by the sun and its reflection on the right, which are also pretty eye-catching. The rocks seem to “point” to the right a little, and lead your eye in that direction, which helps. The big sea stack and the sun also make the image a little top-heavy, but there’s enough interest in the bottom half of the photo to help offset that. There’s balance, but it’s an asymmetrical, dynamic balance. Symmetry and even spacing suggest order and calm, while asymmetry conveys tension. Either can work in the right situation. I usually prefer to convey a serene mood in nature photographs, but I like the sense of tension here.
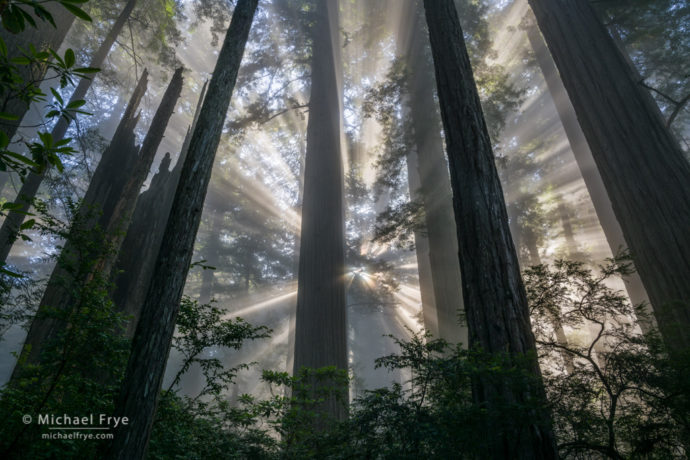
Spacing, separation, and balance are just as important in forest scenes, where random arrangements trunks and branches can often make photographs look chaotic. In this photograph from my last post I found a spot with unusually good separation between trunks in a redwood forest:
Sunbeams in a redwood forest along the northern California coast, USA
I was standing on top of a giant redwood log, which gave me a lot of latitude to move left or right. I paid particular attention to the slanted trunk just left of center, as I knew that would stand out. Fortunately I was able to avoid a visual merger between that trunk and its neighbors, and also keep the sun partially hidden behind branches to avoid lens flare and show the corona. The other trunks are nicely spaced and balanced, and the sunbeams radiating from a central point add to the symmetry.
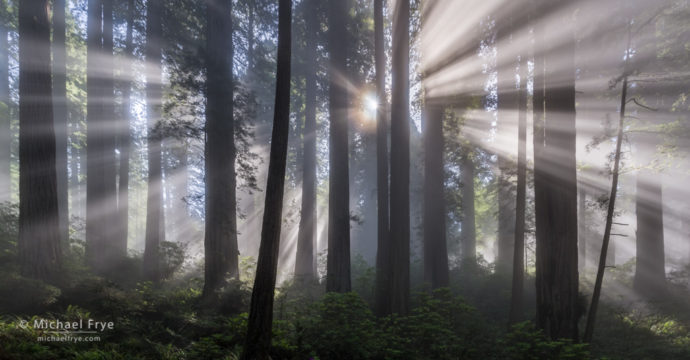
Here’s one more example from the redwood forest. Again, the beams radiating out from the sun help create symmetry. There are some mergers between trunks on the right side, but the most prominent foreground trunks are well-spaced and balanced across the frame:
Sunbeams in a redwood forest along the northern California coast, USA
If nothing else, I hope these examples encourage you to move your feet. You might get the idea for a photograph from Point A, but that’s probably not the ideal place to plant your tripod. Move left, right, forward, back, up, and down until you find the best possible spot for the camera, a place where you can see good separation, spacing, and balance between the different objects you want to include in your photograph.
— Michael Frye
Related Posts: When Separation is a Good Thing; Knowing Where to Stand
Michael Frye is a professional photographer specializing in landscapes and nature. He is the author or principal photographer of The Photographer’s Guide to Yosemite, Yosemite Meditations, Yosemite Meditations for Women, Yosemite Meditations for Adventurers, and Digital Landscape Photography: In the Footsteps of Ansel Adams and the Great Masters. He has also written three eBooks: Light & Land: Landscapes in the Digital Darkroom, Exposure for Outdoor Photography, and Landscapes in Lightroom: The Essential Step-by-Step Guide. Michael has written numerous magazine articles on the art and technique of photography, and his images have been published in over thirty countries around the world. Michael has lived either in or near Yosemite National Park since 1983, currently residing just outside the park in Mariposa, California.


I love all of these but my most favorite are your forest shots. They are just spectacular with so much depth. Thank you for this informative article!
Thank you Laura!
Thanks, Michael, for the great article on balance and separation. I try to keep elements separated and the scene balanced. Your article really helped me to understand more thoroughly. The images are great AND great examples.
You’re welcome Gail – glad you found this helpful!
Hi Michael,
Superb photos all! Thanks for the tips!
Cheers,
Alyn
Thanks Alyn!
Thanks for that excellent short tutorial about composition! The text and images support each other perfectly.
Thank you Bev!
Great shots. I was reading through all the things you were thinking as you moved here and there to alter the position of the stacks, then I got to the last few where you referred to them as a “jumble” and I thought, for all that movement getting the previous shots, I like the jumble shots the best. They have more depth to them. Maybe just me, but to my eye they are the best of the bunch.
Moving one’s feet is great advice. I am slowly weaning myself from zoom lenses getting back to my roots of a few single focal length lenses. Lighter, sharper, and you have to think more, and of course, zoom with your feet. Great advice. Thanks.
Thanks Aram! The photos with the jumbled rocks were both made with wide-angle lenses, with the foreground rocks fairly close to the camera, so I’m sure that’s why they seem to have more depth. That’s all good if you can make it work, but it’s much harder to find a cohesive, not-too-busy composition in a jumble like that.
I love zooms if they’re sharp, but regardless of what lens you’re using you need to move your feet! Finding the right camera position is the essential first step, then you can decide how much to include in the frame from that spot.
Michael… Great work…. You are indeed in the footsteps of the masters. Do you have an adventurous family member who likes to hike and is also a photographer?
Thanks very much Terry. To answer your question, yes – my wife Claudia.
That cormorant is the icing on the cake in your first image, Michael. I enjoyed your walking through your thought process for these scenes.
Thanks Vivienne! I liked that cormorant too – it had a good sense of where to perch, which was very considerate.