by Michael Frye | Jul 6, 2010 | Advanced Techniques, Digital Darkroom, Video Tutorials

Curves in Lightroom and Camera Raw
As promised, I’ve posted another tutorial on YouTube about Curves in Lightroom and Adobe Camera Raw. In this video I examine the default settings in these applications, and why you should avoid using them—at least sometimes. These defaults actually apply three curves to your image before you even start processing it. Watch the video to see what’s really going on “under the hood” with the settings in Lightroom and Camera Raw.
Again I had to break this into two parts; here are the links:
Curves in Lightroom and Camera Raw – Part 1
Curves in Lightroom and Camera Raw – Part 2
 I hope you enjoy these—comments are always welcome! To see everything clearly you need to view in high resolution—click on where it says 240p or 360p in the lower-right corner and choose 480p. Also, if you click on the little double-sided arrow you’ll see the video larger.
by Michael Frye | Apr 23, 2009 | Advanced Techniques, Photography Tips
 Everyone has heard of Photoshop. It’s permeated our culture deeply enough to become both a noun and a verb, as in, “She Photoshopped a telephone pole out of the picture.” So when photographers first dive into the digital world they naturally think of Photoshop or it’s baby sister, Photoshop Elements, for their image-editing software.
Until recently there wasn’t much choice. But in the last few years the landscape has changed, and photographers have many other options. One of the best of these new tools is Lightroom. Actually the full name is Adobe Photoshop Lightroom—it’s made by the same people who make Photoshop. Yet despite the name Lightroom seems to be off the radar screens of most photographers.
In the Spring Yosemite Digital Camera Workshop I’m leading for the Ansel Adams Gallery this week I teach both Photoshop and Lightroom. One of my students asked me recently why she should learn Lightroom when she has Photoshop CS3. What can Lightroom do that Photoshop can’t?
My answer was: very little. Photoshop is the most powerful image-manipulating tool in existence, and can do anything to a photograph that Lightroom can, and much more. But Lightroom has two main advantages over Photoshop: It’s a much better editing, sorting, keywording, and cataloging tool than Photoshop combined with Bridge, and it’s easier to use. And while it’s not as powerful at manipulating photographs as Photoshop, for most images it’s all I need. The image of Mono Lake above, for example, was processed entirely in Lightroom. Having one program that elegantly integrates all these functions takes a lot of friction out of my workflow.
I should point out that I’ve used Photoshop since 1998 and know it inside and out. So I don’t use Lightroom because Photoshop is too complicated for me. But for many people Photoshop is difficult to learn, and Lightroom is a friendlier alternative. I should also add that Lightroom is not for snapshooters. It’s for serious photographers who want an easier, more integrated solution than Photoshop.
There’s one more advantage to Lightroom: It’s a non-destructive editor. Adjustments you make in Lightroom never modify the original Raw or JPEG file. The adjustments are just a set of instructions describing how you want the image to look, and these instructions are only applied when you export the image out of Lightroom. While Photoshop can be tricked into behaving in a non-destructive way, that’s not the way it was designed.
Photoshop is still essential to me for things that Lightroom can’t do. But I’d never want to go back to using only Photoshop and Bridge. And I think Lightroom is a better tool for many photographers than Photoshop. It’s probably time it appeared on more photographer’s radar screens.
by Michael Frye | Dec 19, 2025 | Announcements
A Landscape Photography Webinar
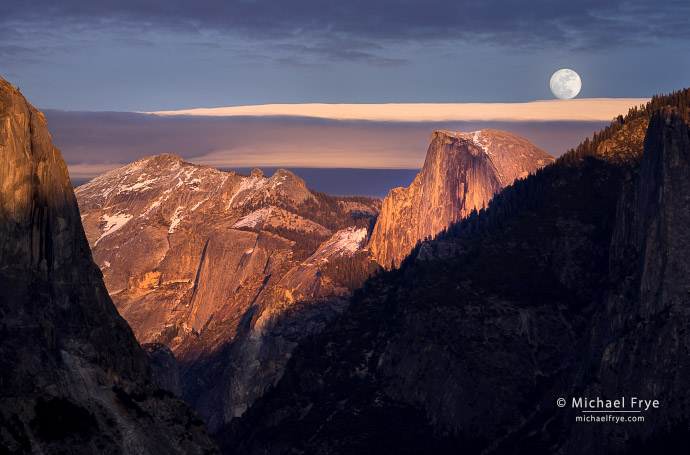
Moon rising above Half Dome from Tunnel View, Yosemite NP, California
Learn how to use simple, powerful tools to plan photos of the sun, moon, Milky Way, or any celestial object
We have powerful tools for photo planning at our fingertips – apps that allow us to predict where the sun or moon might rise or set in relation to the landscape, how the light will look at a given time and place, the position of the Milky Way above the land, and much more.
Unfortunately, many of these tools are excessively complicated, unintuitive, and difficult to learn. I know many photographers who have thrown up their hands and given up when faced with the dense complexity of these apps.
But it doesn’t have to be that way. In this new webinar I’ll show you how I use a few simple tools to precisely visualize the position of the sun, moon, Milky Way (or any celestial object) in relation to the landscape, and see how the light will change for any scene. We’ll delve into apps like PhotoPills, The Photographer’s Ephemeris, The Photographer’s Ephemeris 3D, and Planit Pro – but we’ll stick to the things you need to know, bypassing the extraneous stuff that only gets in the way.
(more…)
by Michael Frye | Oct 5, 2025 | Travels and Stories, Wildlife Photography
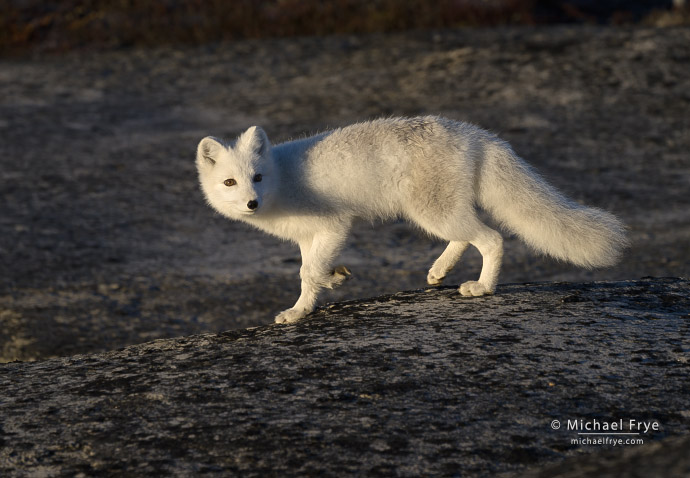
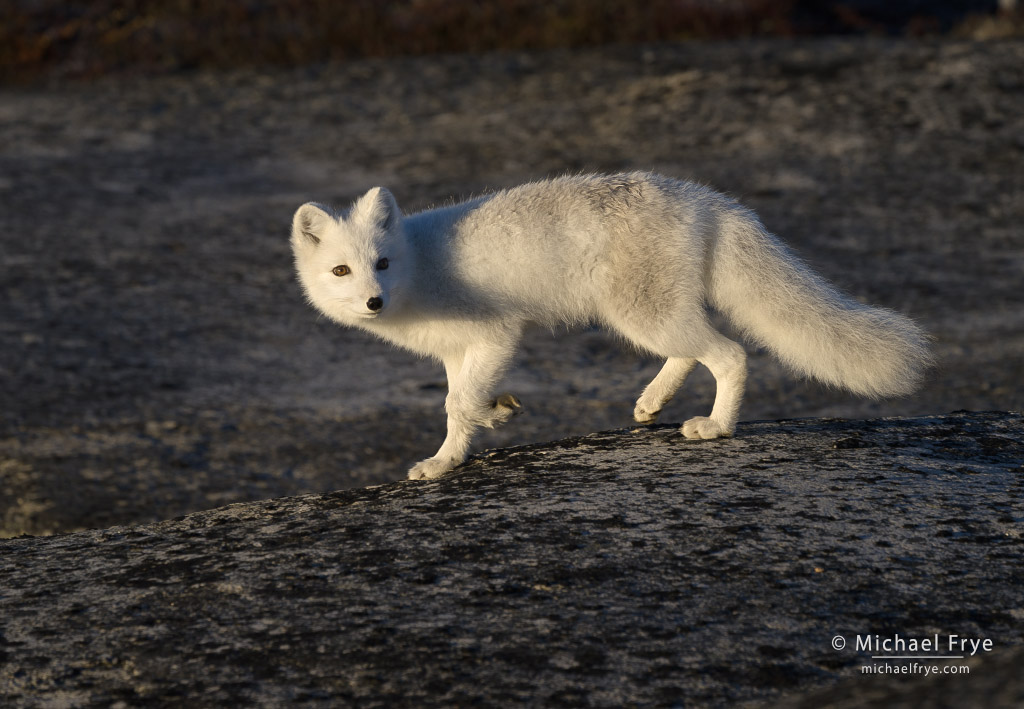
Arctic fox, Scoresby Sund, Greenland
Scoresby Sund, the area of east Greenland we visited on our Visionary Wild trip last month, is spectacularly beautiful. But I didn’t expect to see much wildlife there, because this region is actively hunted by the local Inuit people.
So I was pleasantly surprised by how much wildlife we actually saw, including musk oxen, Arctic hares, Arctic foxes, and polar bears.
(more…)
by Michael Frye | Aug 25, 2025 | Digital Darkroom
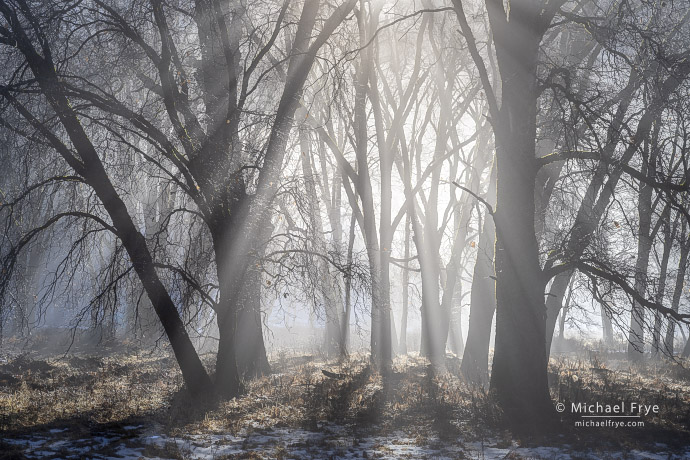
Oaks and mist, Yosemite NP, California. I love the light and fog in this scene, but couldn’t avoid including a distracting wire-mesh enclosure in the composition (see below).
Thanks to everyone who joined us for my Lightroom Webinar: Advanced Retouching on Saturday. It was an engaging, fun, and, I hope, educational session, and it was great to see so many familiar names among the attendees. I appreciate all the thoughtful questions, as they helped broaden the discussion and clarify many points.
One of the things we covered on Saturday was the pros and cons of AI-powered retouching in Lightroom – and how to work around the limitations. Generative Remove in Lightroom and Camera Raw, along with Generative Fill in Photoshop, have certainly made many retouching jobs a lot easier. But one thing that many people don’t realize is that these AI-powered tools can create low-resolution results. So when you remove an object with Generative Remove, that patch, that area where you replaced the object with AI-generated content, might look softer than its surroundings. That’s probably fine for posting an image online, because no one will notice that softness at a small viewing size. But it can be a significant problem when making prints.
(more…)