Photography Tips
by Michael Frye | Apr 25, 2010 | Advanced Techniques, Photography Tips
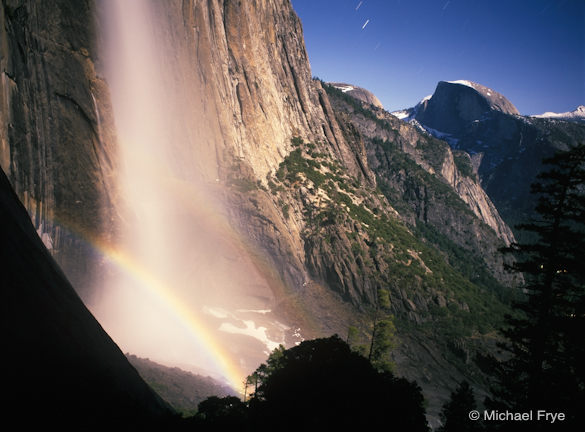
Half Dome and Upper Yosemite Fall with a lunar rainbow
In Friday’s post on my other blog I described some of my experiences attempting to photograph lunar rainbows, but here are some tips for capturing your own moonbow images.
The moon will become full at 5:19 Wednesday morning, so Tuesday night will provide the brightest moonlight, and the best chance to photograph a lunar rainbow this month—if the weather cooperates. Unfortunately the forecast calls for rain. If the predictions are faulty, and some moonlight manages to break through the clouds, cool temperatures will probably limit the amount of spray on Upper Yosemite Fall, so Lower Yosemite Fall may work better. For the upper fall, you might be better off waiting for the next full moon on May 27th. For detailed information on times and places to photograph lunar rainbows in Yosemite, see Don Olson’s site.
For those who aspire to capture lunar rainbows, here are some tips.
Equipment
Any digital SLR will work, but full-frame sensors usually produce less noise and work better for the long exposures required at night. A sturdy tripod is essential, plus a locking cable release or electronic release. You’ll want a good flashlight or headlamp, a watch to time long exposures, and a cloth for wiping spray off the lens if you’re at the lower fall. Long exposures drain batteries quickly, so make sure your camera battery is fully charged—and your spare too.
Focus and Depth of Field
To make exposure times reasonably short, you’ll have to keep your aperture wide open, or close to it. That means you won’t get much depth of field, so try to exclude foregrounds from your compositions. This shallow depth of field makes focusing critical. It’s obviously difficult to focus manually in the dark, and autofocus won’t work either. In the past I’d just manually set the lens at infinity, but many lenses now focus past infinity, making the correct focusing point difficult to determine. The solution is to find something distant that’s bright enough to focus on, like the moon itself, car headlights, or perhaps a bright light that you place far away. Then focus on that bright spot, using either manual or autofocus. The most precise method is probably focusing manually during a zoomed-in look in live view. Once you’ve set the focus, turn autofocus off and don’t touch the focusing ring—leave the lens set at this distance for all your images. You might even tape the focusing ring so it doesn’t move. (more…)
by Michael Frye | Mar 1, 2010 | Photography Tips, Yosemite Photo Conditions

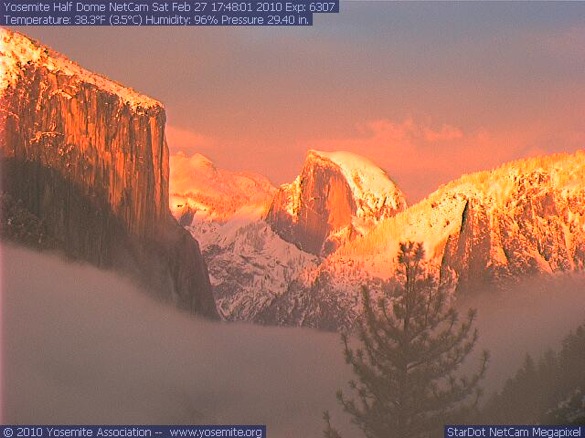
Yosemite Association’s web cam, Saturday, 5:48 p.m.
As I was worked in my office in Mariposa Saturday afternoon I kept an eye on the weather outside, as well as the satellite and radar images on the web, just in case the storm might clear before sunset. It looked like there was a chance, but only a small chance. I had a lot of work to do. I decided to stay home rather than make the two-hour round trip to Yosemite Valley.
Just before sunset I noticed a sliver of clear sky to the west, then sun hitting some trees on a nearby ridge. I looked at the Yosemite Association’s web cam and saw the image you see above. Ouch! Oh well, I guess you can’t always be in the right place at the right time. The moral of the story is that I should always take the chance, even if the odds are low, because it’s precisely those situations when truly spectacular light can occur. I hope some of you were there and captured some great images!
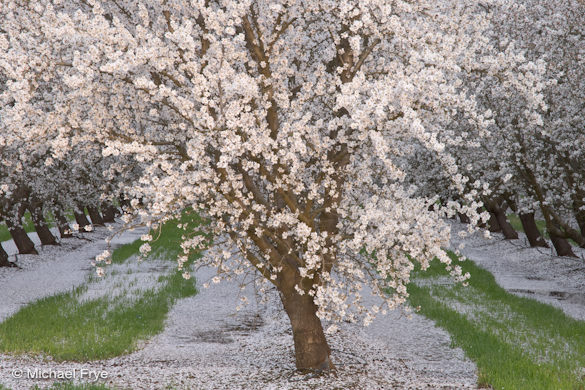
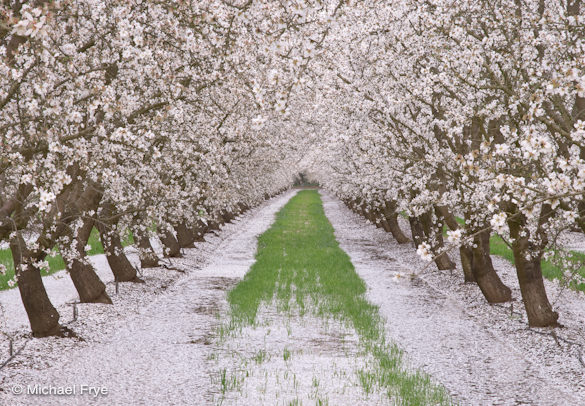
To console myself, my wife Claudia and I drove down to Merced yesterday afternoon to check out the orchards. We found numerous trees in bloom, mostly almonds I think, including this grove where the recent rain had knocked off many petals, making it look like snow had fallen. What appears to be dry ground between the rows of trees is actually long pools of water two to six inches deep covered in blossoms.


by Michael Frye | Feb 12, 2010 | Advanced Techniques, Photography Tips
My latest article for Outdoor Photographer magazine, The Digital Zone System, appears in the March issue, which is just hitting newsstands and mailboxes now. Click here to read it online.
by Michael Frye | Dec 14, 2009 | Digital Darkroom, Photography Tips

Back in the dark ages of film, I carried several graduated neutral-density filters. They were both hard to pronounce and hard to use. First I had to decide which one to pull out—one, two, or three stops? Hard edge or soft? Then, after mounting one on the lens, I struggled to adjust it. The transition—the “graduated” part of the filter—could be almost impossible to see through the viewfinder. The light often vanished while I was still fiddling.
With my first digital camera I realized that graduated filters were no longer necessary. I could recreate the same effect in Photoshop, with more ease and control. And now the latest versions of Lightroom and Adobe Camera Raw even have built-in graduated filter tools. The photographs above show a before-and-after version done with Lightroom—original on the left, digital graduated filter applied on the right to lighten the foreground.
My latest article in the December issue of Digital Photo magazine (formerly PC Photo), titled Digital Graduated Filters, describes how to use the Graduated Filter tools in Lightroom and Camera Raw, plus how to achieve the same effect with Photoshop. The article isn’t on the their web site, but you can find the magazine at newsstands now. I have a related article on my site with some, but not all, of the same material.
by Michael Frye | Oct 13, 2009 | Photography Tips

More than 20 years ago, when I first got serious about photography, I remember being surprised when photographers I looked up to, like William Neill and Jeff Nicholas, expressed disdain for sunlight and excitement about overcast skies. I didn’t question them, or challenge their thinking, but I was puzzled. Wasn’t shade rather dull?
As I gained experience and photographed more intimate scenes I started to understand what they were talking about. They didn’t want soft light for everything, but preferred it for smaller subjects, especially colorful ones like flowers or autumn leaves. The contrast between sun and shade complicates any photograph, especially forest images with branches zig-zagging across the frame. Contrast also overwhelms colors. Soft light, on the other hand, simplifies any subject, and brings out color contrasts. Colors seem to glow with their own inner light when you take away sunlight and the contrast it creates. The photograph of maple leaves in Yosemite above is a good example of this.
Over the ensuing years I’ve made many of my best photographs in the shade. As I head out to photograph colorful leaves in the Sierra this fall, I’m hoping for overcast skies. Barring that, I’ll get out early and late in the day when trees are in the shade.
 Of course there are exceptions, situations where other types of light might be better. Backlight can create beautiful effects with autumn trees, shining through those translucent, colorful leaves from behind and making them glow. This requires the right situation though, where you can place those backlit leaves against a dark background like a shaded hillside or cliff, as in this image of oaks in El Capitan Meadow.
 Another exception is big landscapes—yellow leaves in the foreground, for instance, with a mountain in the background. These rarely work on an overcast day. Photographing big subjects usually requires including some sky, and the sky on an overcast day is often a blank, boring, washed-out white blob. It’s better to have some sun somewhere, and some blue sky, or at least small rifts in the clouds. In this photograph of El Capitan I had sunlight on the rock, and blue skies above, while the foreground was nicely shaded. I did some dodging and burning in Photoshop to lighten the foreground and balance shade with sun.
by Michael Frye | Jun 27, 2009 | Photography Tips

In my post from May 22nd (“Tioga Pass is Open”) I talked about how telephoto lenses can flatten perspective and create abstract patterns. Wide-angle lenses are perfect for creating the opposite effect—a sense of depth in a flat, two-dimensional photograph.
Wide-angle lenses make everything look smaller and further away. They also expand space—they make objects look further apart than normal. You can take advantage of this by exaggerating the size difference between foreground and background to create an illusion of depth. You must get close to something in the foreground, as I did with the rock strata in this photo from Zion—otherwise everything will look small and distant. It also helps to include converging lines, like those in the foreground rocks, to create a sense of perspective. Often a vertical orientation works better than horizontal as you can include a bigger sweep of the foreground.

