I’m pleased to announce that, beginning this week, each person who’s image is selected for a critique will receive a free 16×20 matted print courtesy of the folks at Aspen Creek Photo. Aspen Creek was created by Rich and Susan Seiling, the founders of West Coast Imaging. I’ve used West Coast Imaging for all my drum scans, and know they set high standards and produce great results. Aspen Creek Photo offers excellent prints, similar in many ways to the high-end work produced at West Coast Imaging, at very affordable prices.
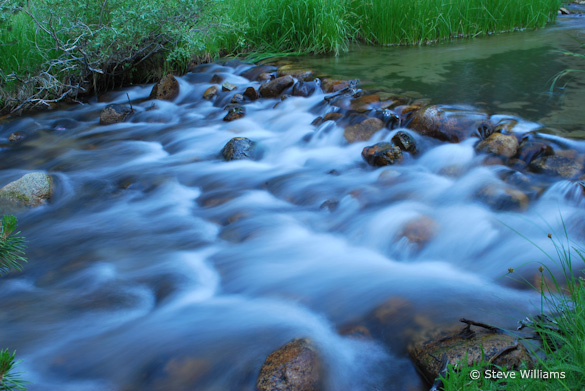
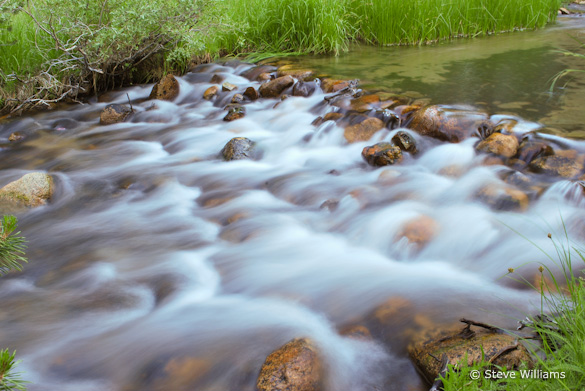
Now, on to the critique… This week’s photograph was made by Steve Williams along Rock Creek, on the eastern slope of my home mountain range, the Sierra Nevada. The small cascade is an intriguing subject, and the slow shutter speed (1/2 second) that Steve chose works well, giving the water that silky, flowing look, and creating a contrast in textures betweensmooth, ethereal water and solid rocks and grasses. There’s a nice, quiet, intimate feeling to the image; it seems like a peaceful place that I would enjoy spending time at.
A small aperture, f/20, kept everything in focus. At first glance the exposure seemed a bit dark to me, and the white balance looked too blue—the white water, or what should be white water, has a distinct blue cast. Using the eyedropper tool in Lightroom, I clicked on the white water, and that made an immediate improvement. The photograph seems warmer, the colors livelier, and the scene more inviting. This color temperature change also boosted the red and green channels, making the image appear brighter as well as warmer. The exposure now looks perfect.
How you handle white balance (or color temperature, or color balance) depends, to a great degree, on whether you’re shooting Raw or JPEG. With Raw the white balance isn’t set in the camera, so it’s easy to adjust later in software. I always shoot in Raw, and usually just leave the camera set to automatic white balance, because it’s a simple matter to make corrections later in Lightroom with the eyedropper or color temperature slider. If the color balance might be tricky, as when photographing flowers or fall foliage at dusk, I include a white or gray card in one of the frames, then click on that card with the Eyedropper later in Lightroom and apply that same white balance setting to the other images made in the same light.
With JPEGs the white balance is set in the camera. While you can adjust it later in software, big changes can be problematic, so it becomes more critical to get it right in the field. You’ll need to set the white balance manually more often.
When you do need to adjust the white balance of a JPEG in software, it’s much easier to do so in Lightroom or Camera Raw, using that Eyedropper tool and the Color Temperature slider, than in Photoshop proper. (To open JPEGs in Camera Raw, select the image in Bridge, then choose File > Open in Camera Raw.)
Changing the white balance in this photograph made a big improvement, but the composition still seemed a bit messy. Edges are always critical, and there are a number of objects here that are half-in, half-out of the frame, including the tips of two branches on the left edge, a rock just above them, and a rock along the bottom edge. The lower-right corner also seems a bit cluttered.
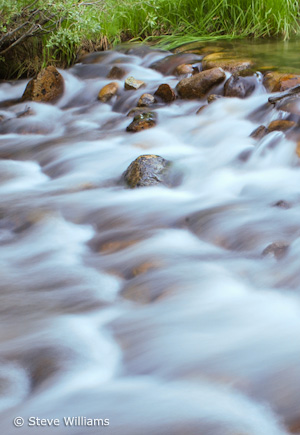
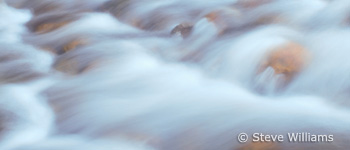
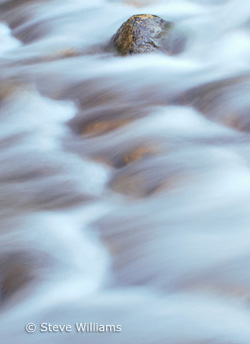
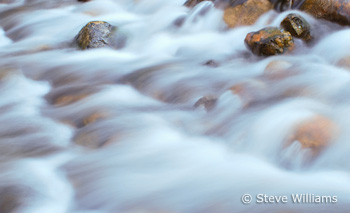
With that in mind I cropped this into a vertical, including just the cascade and the far bank. This was better, but it still seemed like there was something missing. When in doubt I ask myself what catches my eye the most. In this case the answer was easy: the flowing water. So I made several other, tighter crops, picking out interesting sections of the small rapid.
While Steve’s original composition is not exactly a wide, sweeping landscape, it does capture enough of the scene to give us some sense of place—a quiet, grass-lined creek. While I think my tighter crops are stronger designs, they lose some of that feeling and sense of place. This points to a dilemma that photographers often confront. We may prefer to capture a wider view, one that shows what an area looks like. Sometimes we can do so and make a clean, strong composition in the process, but often that wide view includes extraneous clutter. If we pick out a detail, a small piece of that scene, we can often make a strong design out of it, but then lose the context and sense of place.
So what do you do? Capture both. Take the wide view, but then keep looking, and find those interesting details.
When evaluating the images later, you’ll probably find the abstract close-ups more compelling. In photography, design always trumps subject. There’s something about interesting lines, shapes, and patterns that catches our attention and intrigues us as viewers. A photograph needs an incredibly compelling subject—like an exploding volcano, or a wolf dragging down a caribou—to overcome poor design.
One more thing: By making these crops I’m trying to show alternate compositions, things that might have worked better than the original image, and trying to give you ideas for finding better compositions in the field. But I don’t mean to suggest that it’s okay to be sloppy, to capture a wide view with the intention of cropping later. Removing large sections of an image throws away too many of those megapixels you’ve paid so much for, leaving you with a low-resolution image that can’t be enlarged. While minor trimming is fine, it’s always better to frame the scene as precisely as possible in the camera, and keep as much of that precious resolution as possible.
Fourth crop
Thanks Steve for sharing your image! You can see more of his work on Flickr.
As part of being chosen for this week’s critique Steve will receive a free 16×20 matted print courtesy of the folks at Aspen Creek Photo. If you’d like your images considered for future critiques, just upload them to the Flickr group I created for this purpose. If you’re not a Flickr member yet, joining is free and easy. You’ll have to read and accept the rules for the group before adding images, and please, no more than five photos per person per week. I’ll be posting the next critique on April 27th or 28th. Thanks for participating!

