by Michael Frye | Jun 24, 2010 | Advanced Techniques, Digital Darkroom, Video Tutorials

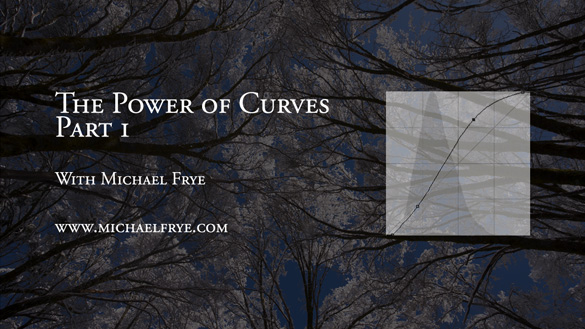
I did something I’ve wanted to do for a long time: post a video tutorial on YouTube. It’s called The Power of Curves, and it’s about, well, curves in Photoshop. This is one of those things that’s just easier to show than explain, so it’s a perfect subject for video.
I think Curves are the single most powerful tool in the digital darkroom; if you learn to master Curves, you’re well on your way to mastering image-processing. Curves tend to intimidate some people, as they seem foreign if you haven’t used them before. But Curves are really quite simple, and I hope this video helps clarify how to use this amazing tool. I had to break this into two parts; here are the links:
The Power of Curves Part 1
The Power of Curves Part 2
Originally I had wanted to talk about the new Point Curve feature in Lightroom 3, but then realized that I needed to explain some basics about Curves first, and that Photoshop was a better tool for that. But I’ll post another video in about two weeks about using Curves in Lightroom and Adobe Camera Raw, and about dealing with their strange default settings.
 So I hope you enjoy these—let me know what you think! To see everything clearly you need to view in high resolution—click on where it says 240p or 360p in the lower-right corner and choose 480p. Also, if you click on the little double-sided arrow you’ll see the video larger.
by Michael Frye | Apr 25, 2010 | Advanced Techniques, Photography Tips
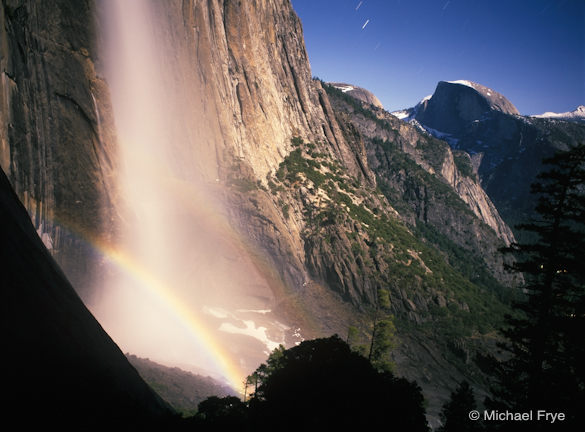
Half Dome and Upper Yosemite Fall with a lunar rainbow
In Friday’s post on my other blog I described some of my experiences attempting to photograph lunar rainbows, but here are some tips for capturing your own moonbow images.
The moon will become full at 5:19 Wednesday morning, so Tuesday night will provide the brightest moonlight, and the best chance to photograph a lunar rainbow this month—if the weather cooperates. Unfortunately the forecast calls for rain. If the predictions are faulty, and some moonlight manages to break through the clouds, cool temperatures will probably limit the amount of spray on Upper Yosemite Fall, so Lower Yosemite Fall may work better. For the upper fall, you might be better off waiting for the next full moon on May 27th. For detailed information on times and places to photograph lunar rainbows in Yosemite, see Don Olson’s site.
For those who aspire to capture lunar rainbows, here are some tips.
Equipment
Any digital SLR will work, but full-frame sensors usually produce less noise and work better for the long exposures required at night. A sturdy tripod is essential, plus a locking cable release or electronic release. You’ll want a good flashlight or headlamp, a watch to time long exposures, and a cloth for wiping spray off the lens if you’re at the lower fall. Long exposures drain batteries quickly, so make sure your camera battery is fully charged—and your spare too.
Focus and Depth of Field
To make exposure times reasonably short, you’ll have to keep your aperture wide open, or close to it. That means you won’t get much depth of field, so try to exclude foregrounds from your compositions. This shallow depth of field makes focusing critical. It’s obviously difficult to focus manually in the dark, and autofocus won’t work either. In the past I’d just manually set the lens at infinity, but many lenses now focus past infinity, making the correct focusing point difficult to determine. The solution is to find something distant that’s bright enough to focus on, like the moon itself, car headlights, or perhaps a bright light that you place far away. Then focus on that bright spot, using either manual or autofocus. The most precise method is probably focusing manually during a zoomed-in look in live view. Once you’ve set the focus, turn autofocus off and don’t touch the focusing ring—leave the lens set at this distance for all your images. You might even tape the focusing ring so it doesn’t move. (more…)
by Michael Frye | Feb 12, 2010 | Advanced Techniques, Photography Tips
My latest article for Outdoor Photographer magazine, The Digital Zone System, appears in the March issue, which is just hitting newsstands and mailboxes now. Click here to read it online.
by Michael Frye | Dec 3, 2009 | Advanced Techniques, Announcements, Video Tutorials
Rich Seiling recently added two excellent Photoshop video tutorials to his blog, Crafting Photographs. Rich is the founder and president of West Coast Imaging, and an expert on all things related to digital printing, so when he gives out free information like this it’s definitely worth checking out.
by Michael Frye | Apr 23, 2009 | Advanced Techniques, Photography Tips
 Everyone has heard of Photoshop. It’s permeated our culture deeply enough to become both a noun and a verb, as in, “She Photoshopped a telephone pole out of the picture.” So when photographers first dive into the digital world they naturally think of Photoshop or it’s baby sister, Photoshop Elements, for their image-editing software.
Until recently there wasn’t much choice. But in the last few years the landscape has changed, and photographers have many other options. One of the best of these new tools is Lightroom. Actually the full name is Adobe Photoshop Lightroom—it’s made by the same people who make Photoshop. Yet despite the name Lightroom seems to be off the radar screens of most photographers.
In the Spring Yosemite Digital Camera Workshop I’m leading for the Ansel Adams Gallery this week I teach both Photoshop and Lightroom. One of my students asked me recently why she should learn Lightroom when she has Photoshop CS3. What can Lightroom do that Photoshop can’t?
My answer was: very little. Photoshop is the most powerful image-manipulating tool in existence, and can do anything to a photograph that Lightroom can, and much more. But Lightroom has two main advantages over Photoshop: It’s a much better editing, sorting, keywording, and cataloging tool than Photoshop combined with Bridge, and it’s easier to use. And while it’s not as powerful at manipulating photographs as Photoshop, for most images it’s all I need. The image of Mono Lake above, for example, was processed entirely in Lightroom. Having one program that elegantly integrates all these functions takes a lot of friction out of my workflow.
I should point out that I’ve used Photoshop since 1998 and know it inside and out. So I don’t use Lightroom because Photoshop is too complicated for me. But for many people Photoshop is difficult to learn, and Lightroom is a friendlier alternative. I should also add that Lightroom is not for snapshooters. It’s for serious photographers who want an easier, more integrated solution than Photoshop.
There’s one more advantage to Lightroom: It’s a non-destructive editor. Adjustments you make in Lightroom never modify the original Raw or JPEG file. The adjustments are just a set of instructions describing how you want the image to look, and these instructions are only applied when you export the image out of Lightroom. While Photoshop can be tricked into behaving in a non-destructive way, that’s not the way it was designed.
Photoshop is still essential to me for things that Lightroom can’t do. But I’d never want to go back to using only Photoshop and Bridge. And I think Lightroom is a better tool for many photographers than Photoshop. It’s probably time it appeared on more photographer’s radar screens.
 So I hope you enjoy these—let me know what you think! To see everything clearly you need to view in high resolution—click on where it says 240p or 360p in the lower-right corner and choose 480p. Also, if you click on the little double-sided arrow you’ll see the video larger.


