Photography Tips
by Michael Frye | Aug 17, 2025 | Digital Darkroom, Photography Tips
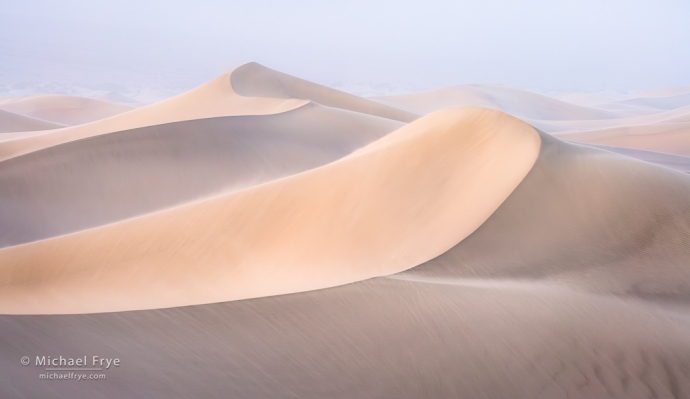
Dunes at sunrise in a sandstorm, Death Valley NP, California. During a dust storm, as you might expect, my sensor accumulated plenty of dust spots (see the next image below).
Removing dust spots from an image can be a tedious chore. Do you want to do that tiresome job twice? I certainly don’t – which is why I remove dust spots in Lightroom, rather than Photoshop.
There’s no way to do retouching in Photoshop in a completely flexible, non-destructive way that adapts to any further changes you make to the underlying layers. But when you remove a spot or object in Lightroom (or Camera Raw), the retouching will always adapt, no matter what you do to the image in the future. Even if you make a drastic change, like lightening the photo by two stops, making a big adjustment to the white balance, or converting it to black and white, the retouching in Lightroom will adapt and blend in seamlessly. And that means you’ll never, ever, have to do it again – which, for me, is a big advantage.
(more…)
by Michael Frye | Apr 20, 2020 | Advanced Techniques, Digital Photography Basics, Photography Tips
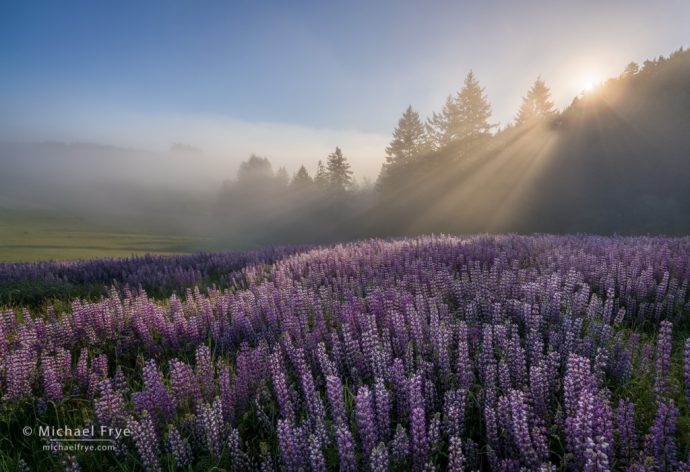
Sun rising over a field of lupines, Redwood NP, California. The focal length was 16mm, and the closest objects to the camera were the flowers at the very bottom of the frame, about two feet from the lens. I used my hyperfocal-distance shortcut to find the optimum focus distance, by doubling the distance from the closest object and focusing at four feet. Then I stopped to down to f/16 to get enough depth of field to make both the foreground and background sharp. 16mm, three bracketed exposures at f/16, ISO 100, blended with Lightroom’s HDR Merge.
In this recent post I talked about the importance of having a solid, well-practiced field routine, so that you don’t forget important steps, and you’ll be less likely to panic when the light gets interesting.
One of the steps in my routine, focusing, deserves a little more attention, so I’m going to cover that step in more detail here.
(more…)
by Michael Frye | Apr 12, 2020 | Advanced Techniques, Digital Photography Basics, Photography Tips
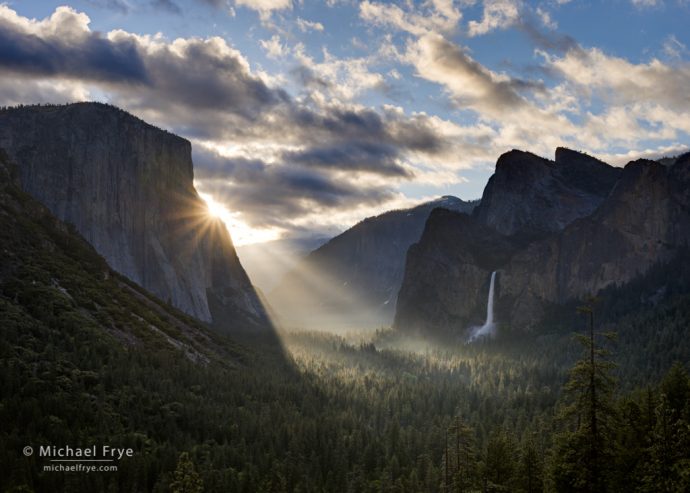
Sunbeams from Tunnel View, spring, Yosemite. Having a solid, well-practiced field routine helps me to calmly capture fleeting moments of light like this. 40mm, three auto-bracketed bracketed exposures at f/11, ISO 100.
Do you have a consistent field routine? Do you go through the same steps, in the same order, every time you take a photograph?
If you said no, you’re in good company. Most photographers I work with don’t have a solid, consistent field routine.
But I think having this routine is vital. Without one, you’re likely to forget important steps, like setting the right f-stop, or checking sharpness (and then kick yourself later when you realize your mistake). And when a rainbow suddenly appears over Yosemite Valley, or sunbeams break through the fog in a redwood forest, having a solid, consistent routine that you’ve practiced over and over will help you avoid panicking. You can just go through your normal routine and concentrate on putting one foot in front of the other, knowing that you won’t forget an important step.
(more…)
by Michael Frye | Oct 31, 2018 | Advanced Techniques, Photography Tips
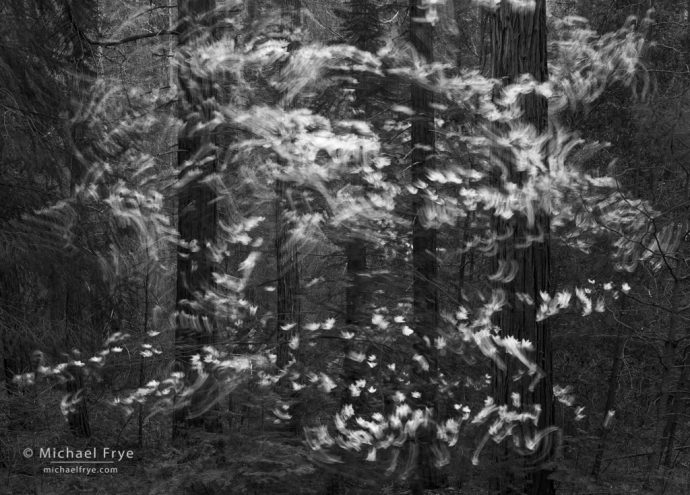
Swirling dogwood blossoms, Yosemite. I used a slow shutter speed (1/2 second) to deliberately blur the motion of these dogwood blossoms, but usually I’m trying to make my photos as sharp as possible.
It’s always disappointing to find out that one of your photos isn’t sharp – especially if it’s an image you like (and you weren’t trying to deliberately blur the image). Yet we all make mistakes. Even professionals like me sometimes take unintentionally blurry photos (as you’ll see below!). But after you’ve swallowed your disappointment, it’s important to figure out why the image is soft so that you don’t make the same mistake again.
There are basically five causes of blurry photos: camera movement, subject movement, missed focus, insufficient depth of field, and lens softness.
(more…)
by Michael Frye | Aug 13, 2017 | Advanced Techniques, Photography Tips
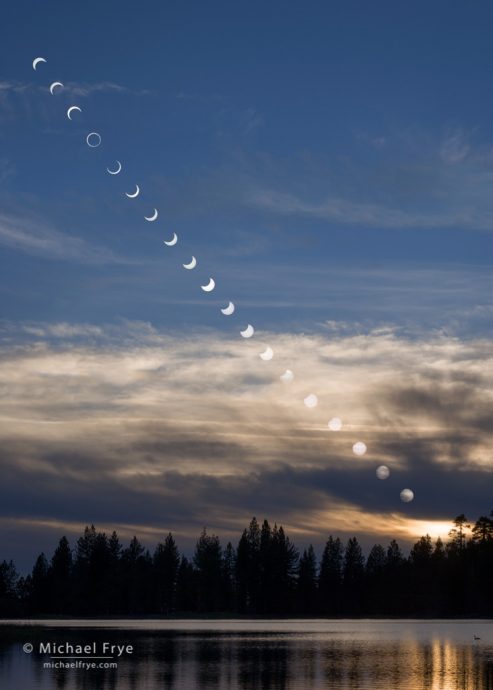
Sequence showing the annular solar eclipse, May 20th, 2012, from Manzanita Lake, Lassen Volcanic NP
The total solar eclipse in the United States is just over a week away (August 21st), and eclipse mania is sweeping the nation. There are many, many articles on the internet describing how to photograph the eclipse (this one by Todd Vorenkamp on the B&H website is the best I’ve found), but I’ll try to cover some topics that haven’t been discussed much elsewhere.
(more…)
by Michael Frye | Nov 20, 2016 | Photography Tips
Sunset at Tenaya Lake, Yosemite. It’s important to check the red channel in the histogram when photographing warm, saturated colors like this.
Every camera has default settings that seem to have been designed for beginning photographers who are handholding the camera. When teaching workshops I frequently dive into the menus on student’s cameras to change those settings (with their permission of course) to ones more suitable for landscape photographers working on a tripod. And the students usually tell me they wished they’d known about those settings sooner.
So here are six camera settings that I urge you to consider changing. These changes will make operating the camera easier, and in some cases might be the difference between getting the shot and missing it.
(more…)


